DCTM 7.3 PostgreSQL with Docker install guide

This is a step-by-step guide to install Documentum 7.3 with Docker in a Linux host with PostgreSQL 9.4.

Environment

Host:
Windows 10 x64 8GB RAM
VMware Workstation Player 12

Guest:
CentOS 7 x64 25GB HD 4GB RAM 2 cores
PostgreSQL 9.4
Docker 1.12
Documentum 7.3 PostgreSQL docker tar file

VM Creation

Mount the CentOS 7 DVD image, boot the machine and follow the steps. You can choose to let EasyInstall do the work for you. I used minimal package install to save resources, named the machine vm-dctm73, configure the network and set the root password.

OS Configuration

Follow the instructions posted in the DCTM 7.3 PostgreSQL Dev. Edition post for configuring the OS and PostgreSQL 9.4 (no need to configure the ODBC, just install PostgreSQL and phpPgAdmin). This time I’ve used “dmdocker” instead of “dmadmin”.

Extra steps to perform:

  • Create the following folder structure:

[dmdocker@vm-dctm73 ~]$ sudo mkdir /opt/dctmdocker
[dmdocker@vm-dctm73 ~]$ sudo chown dmdocker.dmdocker /opt/dctmdocker
[dmdocker@vm-dctm73 ~]$ mkdir /opt/dctmdocker/installers
[dmdocker@vm-dctm73 ~]$ mkdir /opt/dctmdocker/data
[dmdocker@vm-dctm73 ~]$ mkdir /opt/dctmdocker/share

  • Update the distribution (you need at least kernel 3.10.0.229, you can check the version by running “uname -r”)

[dmdocker@vm-dctm73 ~]$ sudo yum update

  • Enable connections from 172.18.x.x to the database (IP used by docker containers, you can set this up after you run a docker contanier and know which IP range will be using, or you can enable access for anyone):

[dmadmin@vm-dctm73 opt]$ sudo vi /var/lib/pgsql/9.4/data/pg_hba.conf
host    all             all             172.18.0.1/24           md5
[dmadmin@vm-dctm73 opt]$ sudo systemctl restart postgresql-9.4

And don’t forget to copy the Documentum 7.3 docker tar file to /opt/dctmdocker/installers

Docker Configuration

  • Install docker:

[dmdocker@vm-dctm73 ~]$ curl -fsSL https://get.docker.com/ | sh

  • I had to remove docker selinux due to incompatibily problems so:

[dmdocker@vm-dctm73 ~]$ yum remove docker-engine-selinux

  • Add user to docker group to avoid using sudo every time we use the docker command:

[dmdocker@vm-dctm73 ~]$ sudo usermod -aG docker dmdocker

  • Enable the service and start docker daemon:

[dmdocker@vm-dctm73 ~]$ sudo systemctl enable docker.service
[dmdocker@vm-dctm73 ~]$ sudo systemctl start docker

  • Check docker is correctly installed by running the hello-world container:

[dmdocker@vm-dctm73 ~]$ docker run –rm hello-world

  • Install docker-compose (using root):

[root@vm-dctm73 ~]# curl -L https://github.com/docker/compose/releases/download/1.9.0/docker-compose-`uname -s`-`uname -m` > /usr/local/bin/docker-compose
[root@vm-dctm73 ~]# chmod +x /usr/local/bin/docker-compose

Content Server Configuration

  • Import the docker image:

[dmdocker@vm-dctm73 installers]$ docker load -i Contentserver_Centos.tar

  • Check the image is listed now in the local docker repository:

[dmdocker@vm-dctm73 ~]$ docker images
REPOSITORY          TAG                 IMAGE ID            CREATED             SIZE
contentserver_centos    7.3.0000.0214        5a22b41bc55f        10 seconds ago      2.252 GB
hello-world         latest              c54a2cc56cbb        5 months ago        1.848 kB

  • Create the tablespace file:

[dmdocker@vm-dctm73 cs]$ su –
[root@vm-dctm73 ~]# su – postgres
-bash-4.2$ mkdir /var/lib/pgsql/9.4/data/db_centdb_dat.dat

  • Configure the required environment variables (remember that lockbox passphrase requires at least one uppercase letter, one symbol and one number):

[dmdocker@vm-dctm73 ~]$ vi .bash_profile

#app server admin password
export APP_SERVER_ADMIN_PASSWORD=dmadmin
#This is install owner password
export INSTALL_OWNER_PASSWORD=dmadmin
#This is root user password
export ROOT_USER_PASSWORD=dmadmin
#Repository password. Required only for stateless configuration
export REPOSITORY_PASSWORD=dmadmin
#External Data base Server Admin password
export EXTERNALDB_ADMIN_PASSWORD=dmadmin
#Global Registry password
export BOF_REGISTRY_USER_PASSWORD=dmadmin
#AEK passphrase
export AEK_PASSPHRASE=dmadmin
export LOCKBOX_PASSPHRASE=Documentum.73

  • Configure statelesscs.conf. Few notes:
    • Change IMAGE_NAME to the name of your image in your docker repository.
    • IP here is the IP of the virtual machine (CentOS) because our database is installed in the host.
    • ENABLE_LOCKBOX=false doesn’t work. It didn’t work for me when I did the (Unofficial) D7.2 Developer Docker edition (I) and it still doesn’t work. It’s probably a misconfiguration of the installer though.

[dmdocker@vm-dctm73 ~]$ vi /opt/dctmdocker/installers/Scripts/statelesscs.conf

###EMC Documentum on Docker
###(c) Copyright EMC Corp., 1992 – 2016
###All rights reserved.
###Version 1.0 dated 08/Sep/2016

#Documentum Content Server Image name
#Here 10.31.4.205 is Bangalore HUB.
#For PLE hub please change the ip as 10.8.46.202
#Here 7.3.0000 pointing to the latest 7.3 CS image. If we need perticular build version then just use 7.3.0000.0xxx
#Ex :  7.3.0000.0176
#Ubuntu Image:  10.31.4.205:5000/contentserver/ubuntu/stateless/cs:7.3.0000
#CentOS Image: 10.31.4.205:5000/contentserver/centos/stateless/cs:7.3.0000
#RHEL Image : 10.31.4.205:5000/contentserver/rhelora/stateless/cs:7.3.0000
IMAGE_NAME = contentserver_centos:7.3.0000.0214

#documentum License
HIGH_VOLUME_SERVER_LICENSE =
TRUSTED_LICNESE=
STORAGEAWARE_LICENSE=
XMLSTORE_LICENSE=
SNAPLOCKSTORE_LICENSE=LDNAPJEWPXQ
RPS_LICENSE=
FED_RECD_SERVICE_LICENSE=
RECORD_MANAGER_LICENSE=
PRM_LICENSE=

#Docbase configuration details
#Base machine IP
EXTERNAL_IP = 192.168.42.131

#External Data base server IP
EXTERNALDB_IP = 192.168.42.131

#External Data base Server Admin User
EXTERNALDB_ADMIN_USER = postgres

#External Data base Server Port number
#Default port for postgres is 5432. Oracle is 1521
DB_SERVER_PORT=5432

#Docbase ID
DOCBASE_ID = 45321

#Docbase name
DOCBASE_NAME = centdb

#Container host name.
CONTAINER_HOSTNAME = centstateless

#Container name.
CONTAINER_NAME = centstateless

#Conent Server port number to map in the base machine
CONTENT_SERVER_PORT= 50000
#Docbroker port number to map in the base machine
DOCBROKER_PORT =1689
#Method Server port number to map in the base machine
METHOD_SVR_PORT=9080

#App server management port
APP_SERVER_MGMNT_PORT=9084

#lockbox and aek related info
AEK_ALGORITHM = AES_256_CBC
#aek name
AEK_NAME = CSaek
#User wants to enable lock box then make it as true and provide the name and passphrase. To disable  lockbox then make it as false
ENABLE_LOCKBOX = true
LOCKBOX_FILE_NAME = lockbox.lb

#These are default values for 7.3. IF any thing is change like Jboss version or product version the change the values here
INSTALL_OWNER_USER=dmadmin
INSTALL_HOME=/opt
JBOSS=wildfly9.0.1
PRODUCT_MAJOR_VERSION=7.3

### remote data machine and docker plugin details.
#docker plugin type local,cifs,nfs etc. By default plugin is local, means the data file system is local. If you use the file system has remote then use proper plugin type and remote host details.
DOCKER_PLUGIN_TYPE=local
#Remote data machine.
EXTERNALDATA_HOST=192.168.42.131
#Data path folder which is on remote machine.You need to create a folder and share it on remote machine
REMOTE_DATA_PATH=/opt/dctmdocker/data
#Share path which is on remote machine. You need to create a folder and share it on remote machine
REMOTE_SHARE_PATH=/opt/dctmdocker/share
#If the docker plugin type is cifs then create a dmadmin user in base machine and provide the uid here. Otherwise this filed is empty.
#While starting the nethsare plugin please use  the same uid and gid as -o parameter
INSTALL_OWNER_UID=

#THUMBNAIL SERVER Configuration parameters. To enable Thumnail server make it as YES.
CONFIGURE_THUMBNAIL_SERVER = NO
THUMBNAIL_SERVER_PORT = 8081
THUMBNAIL_SERVER_SSL_PORT = 8443

  • Configure statelesscs_config_compose.yml:

[dmdocker@vm-dctm73 ~]$ vi /opt/dctmdocker/installers/Scripts/statelesscs_config_compose.yml

version: ‘2’
services:
dctm_cs:
image: contentserver_centos:7.3.0000.0214
environment:
– HIGH_VOLUME_SERVER_LICENSE=
– TRUSTED_LICNESE=
– STORAGEAWARE_LICENSE=
– XMLSTORE_LICENSE=
– SNAPLOCKSTORE_LICENSE=
– RPS_LICENSE=
– FED_RECD_SERVICE_LICENSE=
– RECORD_MANAGER_LICENSE=
– PRM_LICENSE=
– ROOT_USER_PASSWORD=${ROOT_USER_PASSWORD}
– INSTALL_OWNER_PASSWORD=${INSTALL_OWNER_PASSWORD}
– INSTALL_OWNER_USER=dmadmin
– REPOSITORY_PASSWORD=${REPOSITORY_PASSWORD}
– EXTERNAL_IP=192.168.42.131
– EXTERNALDB_IP=192.168.42.131
– EXTERNALDB_ADMIN_USER=postgres
– EXTERNALDB_ADMIN_PASSWORD=${EXTERNALDB_ADMIN_PASSWORD}
– DB_SERVER_PORT=5432
– DOCBASE_ID=45321
– DOCBASE_NAME=centdb
– USE_EXISTING_DATABASE_ACCOUNT=false
– INDEXSPACE_NAME=dm_repo_docbase
– BOF_REGISTRY_USER_PASSWORD=${BOF_REGISTRY_USER_PASSWORD}
– AEK_ALGORITHM=AES_256_CBC
– AEK_PASSPHRASE=${AEK_PASSPHRASE}
– AEK_NAME=CSaek
– ENABLE_LOCKBOX=true
– LOCKBOX_FILE_NAME=lockbox.lb
– LOCKBOX_PASSPHRASE=${LOCKBOX_PASSPHRASE}
– USE_EXISTING_AEK_LOCKBOX=false
– CONFIGURE_THUMBNAIL_SERVER=NO
– EXTDOCBROKERPORT=1689
– CONTENTSERVER_PORT=50000
– APP_SERVER_ADMIN_PASSWORD=${APP_SERVER_ADMIN_PASSWORD}
– INSTALL_OWNER_UID=1001
hostname:
“cont-dctm73”
container_name:
“dctm73docker”
ports:
– “DOCBROKER_PORT:DOCBROKER_PORT”
– “DOCBROKER_SECURE_PORT:DOCBROKER_SECURE_PORT”
– “CONTENT_SERVER_PORT:CONTENT_SERVER_PORT”
– “CONTENT_SERVER_SECURE_PORT:CONTENT_SERVER_SECURE_PORT”
– “METHOD_SVR_PORT:9080”
– “METHOD_SVR_SECURE_PORT:9082”
– “METHOD_SVR_JMX_PORT:9081”
– “THUMBNAIL_SERVER_PORT:8081”
– “THUMBNAIL_SERVER_SSL_PORT:8443”
– “APP_SERVER_MGMNT_PORT:9084”
volumes:
– DocbaseName_odbc:INSTALL_HOME/dctm/odbc
– DocbaseName_data:INSTALL_HOME/dctm/data
– DocbaseName_dba:INSTALL_HOME/dctm/dba
– DocbaseName_share:INSTALL_HOME/dctm/share
– DocbaseName_dfc:INSTALL_HOME/dctm/config
– DocbaseName_xhive_storage:INSTALL_HOME/dctm/xhive_storage
– DocbaseName_XhiveConnector:INSTALL_HOME/dctm/JBOSS/server/DctmServer_MethodServer/deployments/XhiveConnector.ear
– DocbaseName_mdserver_conf:INSTALL_HOME/dctm/mdserver_conf
– DocbaseName_mdserver_log:INSTALL_HOME/dctm/JBOSS/server/DctmServer_MethodServer/log
– DocbaseName_mdserver_logs:INSTALL_HOME/dctm/JBOSS/server/DctmServer_MethodServer/logs
– DocbaseName_Thumbnail_Server_conf:INSTALL_HOME/dctm/product/PRODUCT_MAJOR_VERSION/thumbsrv/conf
– DocbaseName_Thumbnail_Server_webinf:INSTALL_HOME/dctm/product/PRODUCT_MAJOR_VERSION/thumbsrv/container/webapps/thumbsrv/WEB-INF
privileged: true
volumes:
DocbaseName_data:
driver: DOCKER_PLUGIN_TYPE
driver_opts:
share: EXTERNALDATA_HOST/REMOTE_DATA_PATH
DocbaseName_dba:
DocbaseName_share:
driver: DOCKER_PLUGIN_TYPE
driver_opts:
share: EXTERNALDATA_HOST/REMOTE_SHARE_PATH
DocbaseName_dfc:
DocbaseName_odbc:
DocbaseName_XhiveConnector:
DocbaseName_mdserver_conf:
DocbaseName_mdserver_log:
DocbaseName_mdserver_logs:
DocbaseName_Thumbnail_Server_conf:
DocbaseName_Thumbnail_Server_webinf:
DocbaseName_xhive_storage:

  • Run the configuration script:

[dmdocker@vm-dctm73 ~]$ cd /opt/dctmdocker/installers/Scripts/
[dmdocker@vm-dctm73 Scripts]$ chmod 755 stateless_config.sh
[dmdocker@vm-dctm73 Scripts]$ ./stateless_config.sh

  • Now you can get a terminal from the container:

[dmdocker@vm-dctm73 Scripts]$ docker exec -i -t dctm73docker /bin/bash

And check the progress of the installation in /opt/dctm_docker/logs/centstateless/cont-dctm73.log

If anything fails and you need to run the script again, make sure the created volumes (docker volume ls) are removed before running again the script or the installer will fail.

DCTM 7.3 PostgreSQL Dev. Edition

This is a step-by-step guide to install Documentum 7.3 in a Linux environment with PostgreSQL 9.4.

I didn’t bother with screenshots, but installation should be easy 😀

Environment

Host:
Windows 10 x64 8GB RAM
VMware Workstation Player 12

Guest:
CentOS 7 x64 25GB HD 4GB RAM 2 cores
PostgreSQL 9.4
Documentum 7.3

VM Creation

Mount the CentOS 7 DVD image, boot the machine and follow the steps. You can choose to let EasyInstall do the work for you. I used minimal package install to save resources, named the machine vm-dctm73, configure the network and set the root password.

OS Configuration

  • Install required packages:

[dmadmin@vm-dctm73 ~]$ sudo yum install net-tools bash-completion kernel-devel rng-tools.x86_64
[dmadmin@vm-dctm73 opt]$ sudo yum install policycoreutils policycoreutils-python selinux-policy selinux-policy-targeted libselinux-utils setroubleshoot-server setools setools-console mcstrans
[dmadmin@vm-dctm73 ~]$ sudo yum group install X\ Window\ System “Development Tools”

If you want to install vmware tools do it now. You can check the steps in the post for the D7.2 developer edition

  • Stop and disable the firewalld service:

[dmadmin@vm-dctm73 ~]$ sudo systemctl disable firewalld
[dmadmin@vm-dctm73 ~]$ sudo systemctl stop firewalld

  • Configure the entropy and allow http connections through selinux:

[dmadmin@vm-dctm73 opt]$ sudo /sbin/rngd -b -r /dev/urandom -p /dev/random
[dmadmin@vm-dctm73 opt]$ sudo setsebool -P httpd_can_network_connect_db 1

  • Create folder structure for Documentum:

[dmadmin@vm-dctm73 opt]$ sudo mkdir documentum
[dmadmin@vm-dctm73 opt]$ sudo chown dmadmin.dmadmin documentum
[dmadmin@vm-dctm73 opt]$ mkdir documentum/product
[dmadmin@vm-dctm73 opt]$ mkdir documentum/product/7.3
[dmadmin@vm-dctm73 opt]$ mkdir documentum/installers
[dmadmin@vm-dctm73 opt]$ mkdir documentum/installers/cs

PostgreSQL Configuration

  • Install required packages:

[dmadmin@vm-dctm73 opt]$ sudo yum install https://download.postgresql.org/pub/repos/yum/9.4/redhat/rhel-7-x86_64/pgdg-centos94-9.4-3.noarch.rpm
[dmadmin@vm-dctm73 opt]$ sudo yum install postgresql94-server postgresql94-contrib

  • Init the DB:

[dmadmin@vm-dctm73 opt]$ sudo /usr/pgsql-9.4/bin/postgresql94-setup initdb

  • Enable and start the PostgreSQL service:

[dmadmin@vm-dctm73 opt]$ sudo systemctl enable postgresql-9.4
Created symlink from /etc/systemd/system/multi-user.target.wants/postgresql-9.4.service to /usr/lib/systemd/system/postgresql-9.4.service.
[dmadmin@vm-dctm73 opt]$ sudo systemctl start postgresql-9.4

  • Configure the postgres user:

[dmadmin@vm-dctm73 opt]$ su – root
[root@vm-dctm73 ~]# su – postgres-bash-4.2$ psql
postgres=# \password postgres
postgres=# \q
-bash-4.2$ exit
logout

  • Configure PostgreSQL:

[dmadmin@vm-dctm73 opt]$ sudo vi /var/lib/pgsql/9.4/data/postgresql.conf
listen_addresses = ‘*’
port = 5432

[dmadmin@vm-dctm73 opt]$ sudo vi /var/lib/pgsql/9.4/data/pg_hba.conf
host    all             all             127.0.0.1/32            md5
host    all             all             vm-dctm73               md5

  • Restart PostgreSQL service to apply the changes:

[dmadmin@vm-dctm73 opt]$ sudo systemctl restart postgresql-9.4

phpPgAdmin Configuration

  • Install required packages:

[dmadmin@vm-dctm73 opt]$ sudo yum install phpPgAdmin httpd

  • Configure phpPgAdmin:

[dmadmin@vm-dctm73 opt]$ sudo vi /etc/httpd/conf.d/phpPgAdmin.conf

# Apache 2.4
Require all granted
#Require host example.com

# Apache 2.2
Order deny,allow
 Allow from all
# Allow from 127.0.0.1
# Allow from ::1
# Allow from .example.com

[dmadmin@vm-dctm73 opt]$ sudo vi /etc/phpPgAdmin/config.inc.php
$conf[‘servers’][0][‘host’] = ‘192.168.42.130’;
$conf[‘extra_login_security’] = false;
$conf[‘owned_only’] = true;

  • Restart httpd service to apply the changes:

[dmadmin@vm-dctm73 opt]$ sudo systemctl restart httpd

Now you should be able to login to the console from http://vm-dctm73/phpPgAdmin/

ODBC Configuration

  • Install required packages:

[dmadmin@vm-dctm73 opt]$ sudo yum install postgresql94-odbc-debuginfo.x86_64 postgresql94-odbc.x86_64 unixODBC.x86_64

  • Configure .ini files:

[dmadmin@vm-dctm73 opt]$ sudo vi /etc/odbcinst.ini
[PostgreSQL]
Description     = ODBC for PostgreSQL
#Driver         = /usr/lib/psqlodbcw.so
#Setup          = /usr/lib/libodbcpsqlS.so
#Driver64       = /usr/lib64/psqlodbcw.so
#Setup64                = /usr/lib64/libodbcpsqlS.so
Driver          = /usr/pgsql-9.4/lib/psqlodbcw.so
Driver64        = /usr/pgsql-9.4/lib/psqlodbcw.so
Setup64         = /usr/lib64/libodbcpsqlS.so
FileUsage       = 1

[dmadmin@vm-dctm73 opt]$ sudo vi /etc/odbc.ini
[MyPostgres]
Description=PostgreSQL
Driver=PostgreSQL
Database=postgres
Servername=vm-dctm73
UserName=postgres
Password=dmadmin
Port=5432
Protocol=7.4
ReadOnly=No
RowVersioning=No
ShowSystemTables=No
ShowOidColumn=No
FakeOidIndex=No
UpdateableCursors=Yes
DEBUG=Yes

  • Test the connection:

[dmadmin@vm-dctm73 opt]$ isql -v MyPostgres
+—————————————+
| Connected!                            |
|                                       |
| sql-statement                         |
| help [tablename]                      |
| quit                                  |
|                                       |
+—————————————+
SQL> quit


Content Server install

  • Set up environment variables:

[dmadmin@vm-dctm73 opt]$ cd $HOME
[dmadmin@vm-dctm73 ~]$ vi .bash_profile
DOCUMENTUM=/opt/documentum
export DOCUMENTUM

DM_HOME=$DOCUMENTUM/product/7.3
export DM_HOME

POSTGRESQL_HOME=/usr/pgsql-9.4
export POSTGRESQL_HOME

PATH=$PATH:$DM_HOME/bin:$POSTGRESQL_HOME/bin:$HOME/.local/bin:$HOME/bin
export PATH

LC_ALL=C
export LC_ALL

LD_LIBRARY_PATH=$POSTGRESQL_HOME/lib:$DM_HOME/bin:/opt/documentum/java64/JAVA_LINK/jre/lib/amd64/server:$LD_LIBRARY_PATH
export LD_LIBRARY_PATH

  • Reserve ports for services:

[dmadmin@vm-dctm73 ~]$ sudo vi /etc/services
dctm73          49001/tcp               # dctm73 native
dctm73_s        49002/tcp               # dctm73 secure

  • Create symbolic link for later (configuration program):

[dmadmin@vm-dctm73 ~]$ sudo ln -s /usr/lib64/libsasl2.so.3 /usr/lib64/libsasl2.so.2

  • Run the installer:

[dmadmin@vm-dctm73 ~]$ cd /opt/documentum/installers/cs/
[dmadmin@vm-dctm73 cs]$ chmod 775 serverSetup.bin
[dmadmin@vm-dctm73 cs]$ ./serverSetup.bin

Just follow the installer and CS files will be installed.

Repository configuration

  • Create the tablespace file for the repository (dctm73):

[dmadmin@vm-dctm73 cs]$ su – root
[root@vm-dctm73 ~]# su – postgres
-bash-4.2$ mkdir /var/lib/pgsql/9.4/data/db_dctm73_dat.dat

  • Test database connection with dmdbtest:

[dmadmin@vm-dctm73 cs]$ dmdbtest -Dpostgres -SMyPostgres -Upostgres -Pdmadmin
Failed to make a database connection using the following data:
Database Server: MyPostgres
Database Name  : postgres
User Name      : postgres
User Password  : Check either the -P flag on command line or
the password file specified in your server.ini
Error from database system is:  STATE=01000, CODE=0, MSG=[unixODBC][Driver Manager]Can’t open lib ‘/usr/pgsql-9.4/lib/psqlodbcw.so’ : file not found
ERROR(-1)   (system code: -1)

What? Well, after some digging, the easiest solution is to take that library from the docker image. If you have no idea what Docker is, or you think it is a brand of jeans, just download the docker tar from EMC and open Contentserver_Centos\eddd155b2fecc3cc682aeec8d9c6e966259e3df22fe15d6fd6e34dc9d41fe0d4\layer.tar. You’ll find there the files you need.

  • So, copy the files to the /usr/pgsql-9.4/lib directory:

[dmadmin@vm-dctm73 installers]$ chmod 755 *.so
[dmadmin@vm-dctm73 installers]$ sudo cp *.so /usr/pgsql-9.4/lib/

  • And run the test again:

[dmadmin@vm-dctm73 installers]$ dmdbtest -Dpostgres -SMyPostgres -Upostgres -Pdmadmin
Database successfully opened.
Test table successfully created.
Test view successfully created.
Test index successfully created.
Insert into table successfully done.
Index successfully dropped.
View successfully dropped.
Database case sensitivity test successfully past.
Table successfully dropped.

  • Now run the server configuration program:

[dmadmin@vm-dctm73 installers]$ ../product/7.3/install/dm_launch_server_config_program.sh

Configure the docbroker, the repository, and when the installation finishes, check the installation guide (Documentum Platform and Platform Extensions 7.3 Installation Guide) and go through the section “Tuning PostgreSQL database


What I expect for Documentum from ECD/OpenText

What I think OpenText should keep:

  • Support Community
  • ContentHub
  • EMC Support (at least the search engine with the knowledge base)
  • Download Center (After so many changes, I really don’t want to change again :P)
  • EMC GitHub
  • Webtop (It’s the only client that works OOTB)

What I think OpenText should change:

  • Sales policy (Stop pushing products that customers don’t need, and yes, that means D2 and xCP for customers that simply want a “library”)
  • Sort libraries/dependencies in the Documentum stack (if 7.x is released, make it that every product has the same version of every library). Rebrand products accordingly (yeah, Webtop 7.x if it is using DFC 7.x)
  • Detailed changelog of the products (don’t force us to go through every single customization to check if some component we’re extending has changed and broke the customizations)
  • Kill lockbox with fire (or at least, make it optional for both CS and D2). Nobody understands it, nobody knows how to set it up, so it is more a pain in the ass than a security feature
  • Oh, and remove D2 dependency on JMS

I’ve lost any hope to see dmbasic gone for good, or JBOSS replaced with something “lighter”, that’s why those didn’t make it into the list (as probably many others, that I don’t remember now)

(And yes, I’m not a huge fan of D2 :P)

WebTop’s new content transfer mechanism

Yesterday I saw Webtop 6.8.2 was released, and as this was great news because this version was supposed to remove Java applets once and for all. While most of us though that removing applets would imply moving to HTML5, EMC has decided to implement an intermediate solution 😦

Webtop 6.8.2 will prompt users to install a browser extension first time you log in:

webtop-warning

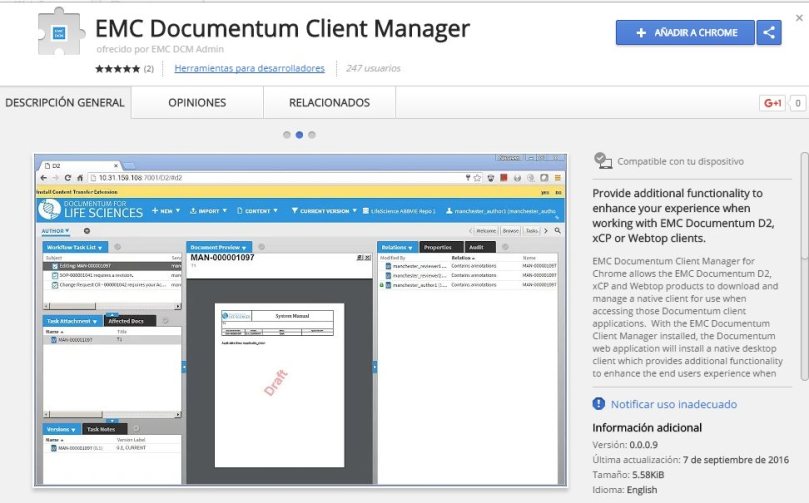
In Firefox the extension will be installed, and in Chrome user will be redirected to the Chrome Web Store:

webtop-chrome-extension

After installing the extension, the first time users try to download something they’ll be prompted to install a local application that will handle the transfers (WebSockets I presume).

Good news: Now you don’t need to fight with Java/browser combination

Bad news: Users have to perform operations. Not the cleanest solution (IMHO).

Bonus: Now importing files is really not-user friendly:

  1. File -> import
  2. Ugly Java window will pop-up over the import container asking for files to import
  3. Select files/folders, press ok and… nothing happens. You are kept in a blank container window with “Next” and “Finish” buttons and no indication whatsoever if the files are been/have been uploaded or what is going on.

(Unofficial) D7.2 Developer Docker edition (II)

In this post I’ll explain how to move from the full environment in a single image/container described in the previous post ((Unofficial) D7.2 Developer Docker edition (I)) to a multi-image/container environment. As I said in the previous post, if you want to set up a complete environment you better check the existing guides (GitHub – jppop/dctm-docker: Documentum running in containers, dctm/docker at master · andreybpanfilov/dctm · GitHub) instead of this one

Database:

This is the easiest part, as the Dockerfile is exactly the same we used previously to set up the database:

FROM centos
RUN echo root:root | chpasswd

RUN yum install -y passwd sudo tail vi libaio bc initscripts net-tools libXp.x86_64 libXp.i686 libXi.i686 libXtst.i686 libXt.i686 glibc.i686 libgcc.i686 libstdc++.i686 libaio.i686; \
yum clean all

RUN mkdir -p /run/lock/subsys

ADD db/oracle-xe-11.2.0-1.0.x86_64.rpm /tmp/
RUN yum localinstall -y /tmp/oracle-xe-11.2.0-1.0.x86_64.rpm; \
rm -rf /tmp/oracle-xe-11.2.0-1.0.x86_64.rpm

ADD db/config/xe.rsp db/config/init.ora db/config/initXETemp.ora /u01/app/oracle/product/11.2.0/xe/config/scripts/
RUN chown oracle:dba /u01/app/oracle/product/11.2.0/xe/config/scripts/*.ora \
/u01/app/oracle/product/11.2.0/xe/config/scripts/xe.rsp
RUN chmod 755 /u01/app/oracle/product/11.2.0/xe/config/scripts/*.ora \
/u01/app/oracle/product/11.2.0/xe/config/scripts/xe.rsp
ENV ORACLE_HOME /u01/app/oracle/product/11.2.0/xe
ENV ORACLE_SID XE
ENV PATH $ORACLE_HOME/bin:$PATH

RUN /etc/init.d/oracle-xe configure responseFile=/u01/app/oracle/product/11.2.0/xe/config/scripts/xe.rsp

RUN echo oracle:oracle | chpasswd

RUN mkdir /u01/app/oracle/product/11.2.0/xe/lib32; \
chown oracle:dba /u01/app/oracle/product/11.2.0/xe/lib32

ADD db/instantclient_11_2/lib* /u01/app/oracle/product/11.2.0/xe/lib32/

RUN ln -s /u01/app/oracle/product/11.2.0/xe/lib32/libclntsh.so.11.1 /u01/app/oracle/product/11.2.0/xe/lib32/libclntsh.so; \
ln -s /u01/app/oracle/product/11.2.0/xe/lib32/libocci.so.11.1 /u01/app/oracle/product/11.2.0/xe/lib32/libocci.so; \
chown -h oracle:dba /u01/app/oracle/product/11.2.0/xe/lib32/*; \
chown -h oracle:dba /u01/app/oracle/product/11.2.0/xe/lib32/libclntsh.so; \
chown -h oracle:dba /u01/app/oracle/product/11.2.0/xe/lib32/libocci.so

ADD db/config/startdb.sh /

EXPOSE 1521

CMD /startdb.sh ; bash

Then build the image:

docker build -t database .

Now we can run the image by running:

docker run -dit -p 1521:1521 db

which will run the container as a daemon publishing the port 1521 so we can connect from another container.

Content Server / Repository:

This needs extra work from the previous setup. First, we need to install the oracle client:

FROM centos

RUN echo root:root | chpasswd

RUN yum install -y libaio sudo tail vi openssh-server; \
yum clean all; \
sed -i ‘s/PermitRootLogin without-password/PermitRootLogin yes/’ /etc/ssh/sshd_config; \
sed ‘s@session\s*required\s*pam_loginuid.so@session optional pam_loginuid.so@g’ -i /etc/pam.d/sshd

ADD db/install/oracle-instantclient11.2-sqlplus-11.2.0.3.0-1.x86_64.rpm /tmp/oracle-instantclient11.2-sqlplus-11.2.0.3.0-1.x86_64.rpm
ADD db/install/oracle-instantclient11.2-basic-11.2.0.3.0-1.x86_64.rpm /tmp/oracle-instantclient11.2-basic-11.2.0.3.0-1.x86_64.rpm

RUN rpm -ivh /tmp/oracle-instantclient11.2-sqlplus-11.2.0.3.0-1.x86_64.rpm /tmp/oracle-instantclient11.2-basic-11.2.0.3.0-1.x86_64.rpm; \
rm /tmp/oracle-instantclient11.2-sqlplus-11.2.0.3.0-1.x86_64.rpm; \
rm /tmp/oracle-instantclient11.2-basic-11.2.0.3.0-1.x86_64.rpm

Now, let’s install CS:

Create the dmadmin user:

RUN useradd dmadmin; \
passwd -f -u dmadmin; \
mkdir -p /home/dmadmin/.ssh; chown dmadmin /home/dmadmin/.ssh; chmod 700 /home/dmadmin/.ssh; \
echo “dmadmin ALL=(ALL) ALL” >> /etc/sudoers.d/dmadmin; \
sed -i -e ‘s/Defaults requiretty.*/ #Defaults requiretty/g’ /etc/sudoers

Create folder structure:

RUN mkdir /opt/documentum; \
mkdir /opt/documentum/product; \
mkdir /opt/documentum/product/7.2; \
mkdir /opt/documentum/install; \
mkdir /opt/documentum/db; \
chown -R dmadmin:dmadmin /opt/documentum

Copy files, including a new config.properties containing the setup of an additional docbroker (we need this to do the IP translation so external machines can connect to the repository):

ADD cs/install/* /opt/documentum/install/
ADD cs/config/installProperties.properties /opt/documentum/install/
ADD cs/config/configProperties.properties /opt/documentum/install/
ADD cs/config/configPropertiesDoc.properties /opt/documentum/install/

Preinstallation checks:

RUN echo “#dctm services” >> /etc/services ; \
echo “dctm72 49001/tcp # 7.2 Repository native connection” >> /etc/services ; \
echo “dctm72_s 49002/tcp # 7.2 Repository secure connection” >> /etc/services ; \
ln /usr/lib64/libsasl2.so.3 /usr/lib64/libsasl2.so.2; \
ln -s /usr/lib/oracle/11.2/client64/lib/libclntsh.so.11.1 /usr/lib/oracle/11.2/client64/lib/libclntsh.so; \
ln -s /usr/lib/oracle/11.2/client64/lib/libocci.so.11.1 /usr/lib/oracle/11.2/client64/lib/libocci.so; \
chown -R dmadmin:dmadmin /opt/documentum/install; \
chmod u+x /opt/documentum/install/serverSetup.bin

ENV DOCUMENTUM /opt/documentum
ENV DM_HOME $DOCUMENTUM/product/7.2
ENV LC_ALL C
ENV JAVA_HOME /opt/documentum/java64/1.7.0_72
ENV ORACLE_HOME /usr/lib/oracle/11.2/client64
ENV ORACLE_SID XE
ENV PATH $ORACLE_HOME/bin:$DM_HOME/bin:$PATH
ENV NLS_LANG AMERICAN_AMERICA.AL32UTF8
ENV LD_LIBRARY_PATH=/usr/lib/oracle/11.2/client64/lib:$DM_HOME/bin/FIPS/:$JAVA_HOME/jre/lib/amd64/server:$DM_HOME/bin:$LD_LIBRARY_PATH
ENV PATH=/usr/lib/oracle/11.2/client64/bin:$PATH
ENV TNS_ADMIN=/opt/documentum/db

And run the silent install:

RUN $DOCUMENTUM/install/serverSetup.bin -f installProperties.properties

Now that the content server is installed, we need to create a repository. We’ll need to use a tnsnames.ora pointing to our running database container. In this case I’m hadrdcoding the docker virtual machine IP for the installation, however, fix_tnsnames.sh takes an environment variable (defined in the docker run command) and updates the file so the container can connect to the database if the IP changes:

ENV DBHOST 192.168.99.100
ADD db/config/tnsnames.ora /opt/documentum/db/
ADD db/config/fix_tnsnames.sh /opt/documentum/

The dmdbtest “patch”:

RUN /opt/documentum/fix_tnsnames.sh; \
mv $DM_HOME/bin/dmdbtest $DM_HOME/bin/dmdbtest.bak; \
echo “exit 0” >> $DM_HOME/bin/dmdbtest; \
chmod u+x $DM_HOME/bin/dmdbtest

And run the docbrokers/repository configuration:

RUN sed -i “/SERVER.PROJECTED_DOCBROKER_HOST/cSERVER.PROJECTED_DOCBROKER_HOST=$HOSTNAME” /opt/documentum/install/configProperties.properties; \
sed -i “/SERVER.SMTP_SERVER_NAME/cSERVER.SMTP_SERVER_NAME=$HOSTNAME” /opt/documentum/install/configProperties.properties; \
sed -i “/SERVER.FQDN/cSERVER.FQDN=$HOSTNAME” /opt/documentum/install/configProperties.properties; \
/opt/documentum/product/7.2/install/dm_launch_server_config_program.sh -f /opt/documentum/install/configPropertiesDoc.properties; \
/opt/documentum/product/7.2/install/dm_launch_server_config_program.sh -f /opt/documentum/install/configProperties.properties

Final touches:

EXPOSE 22 1489 1492 49001 49002
ADD cs/config/startup-dctm.sh /opt/documentum/startup-dctm.sh
CMD /opt/documentum/fix_tnsnames.sh; /opt/documentum/startup-dctm.sh ; bash

startup-dctm.sh should:

  • Update server.ini host and projection target 1 for the additional docbroker.
  • Update dfc.properties with the right hostname
  • Delete dfc.keystore
  • Run dm_crypto_boot
  • Add the IP translation section to DocbrokerExt.ini
  • Update dfc.properties with both dockbrokers
  • Launch docbroker services (using -init_file for our additional docbroker)
  • Run JMS
  • Start repository.

Now we just have to build the image:

docker build -t dctm72 .

and run it:

docker run -dit -p 1489:1489 -p 1492:1492 -p 49001:49001 -p 49002:49002 –env DBHOST=192.168.99.100 dctm

Application Server

Finally, let’s build the application server image (quite self-explanatory):

FROM centos
ADD install/apache-tomcat-8.0.14.tar.gz /opt/

RUN mv /opt/apache-tomcat-8.0.14 /opt/tomcat

RUN yum install -y unzip; \
yum clean all

ADD install/da.war /opt/tomcat/webapps/
RUN unzip /opt/tomcat/webapps/da.war -d /opt/tomcat/webapps/da; \
sed -i “/<compression_filter_enabled>true</compression_filter_enabled>/c<compression_filter_enabled>false</compression_filter_enabled>” /opt/tomcat/webapps/da/wdk/app.xml; \
rm /opt/tomcat/webapps/da.war
ADD config/catalina.properties /opt/tomcat/conf/
ADD config/context.xml /opt/tomcat/conf/
ADD config/server.xml /opt/tomcat/conf/
ADD config/web.xml /opt/tomcat/conf/
ADD config/catalina.sh /opt/tomcat/bin/
ADD config/starttomcat.sh /opt/tomcat/bin/

ADD install/jdk-8u91-linux-x64.tar.gz /opt/
EXPOSE 8080
CMD /opt/tomcat/bin/starttomcat.sh ; bash

starttomcat.sh will simply update da/WEB-INF/classes/dfc.properties with the right CS host/port

So let’s build the image:

docker build -t appserver .

And run it with:

docker run -dit -p 8080:8080 –env CSHOST=192.168.99.100 –env CSPORT=1492 tomcat

And if everything worked fine, you’ll have 3 containers running the same Documentum environment we had previously running in a single container.

(Unofficial) D7.2 Developer Docker edition (I)

I was playing around with Docker (well, with Docker toolbox for Windows…) and decided to give this a go. The following post contains instructions on how to build a single image hosting a similar environment to the previously posted (Unofficial) D7.2 Developer Edition.

This is not the cleanest, nor more elegant solution, so I wouldn’t use this for anything else than testing/learning purposes. If you want something more “professional” you should check the existing guides/scripts to build a documentum environment using docker: xCP dockerized environment (GitHub – jppop/dctm-docker: Documentum running in containers) and docker-dctm (dctm/docker at master · andreybpanfilov/dctm · GitHub) by PanfilovAB

So here we go:

Step 1: Install docker-toolbox

Well, simply run the installer, next, next, next, Finish. Just be sure to check the option to install the NDIS5 driver. The docker toolbox for Windows installs Oracle VirtualBox and has a headless vbox running a base *nix image (boot2docker) designed to run containers (there’s is a beta docker for Windows 10 enterprise that works directaly against MS HyperV without an intermediate virtualization software).

Step 2: Get a “more suitable” default docker machine

Default docker vm has 1gb ram, so we’ll delete it:

docker-machine rm default

And create a new one with 4g RAM and using 2 cpus

docker-machine create -d virtualbox –virtualbox-memory 4096 –virtualbox-cpu-count 2 –engine-storage-driver overlay default

Step 3: Fix swap space for Oracle XE

thanks to GitHub – madhead/docker-oracle-xe: CentOS 7 Docker image with Oracle XE 11.2.0 onboard:

The steps are same as for usual build, but you need to configure swap space in boot2docker / Docker Machine prior the build:

Log into boot2docker / Docker Machine: boot2docker ssh or docker-machine ssh default (replace default if needed).

Create a file named bootlocal.sh in /var/lib/boot2docker/ with the following content:

#!/bin/sh
SWAPFILE=/mnt/sda1/swapfile
dd if=/dev/zero of=$SWAPFILE bs=1024 count=2097152
mkswap $SWAPFILE && chmod 600 $SWAPFILE && swapon $SWAPFILE
Make this file executable: chmod u+x /var/lib/boot2docker/bootlocal.sh

After restarting boot2docker / Docker Machine, it will have increased swap size. Just follow the steps above to build this image.

Step 4: Get the installers ready

You should have a folder structure similar to this one:

cs\config\configProperties.properties -&gt; repository install script
cs\config\installProperties.properties -&gt; cs install script
cs\config\startup-dctm.sh -&gt; dctm startup script
cs\install\appServer.jar
cs\install\bocs-ws.ear
cs\install\composer.jar
cs\install\dfcUnix.zip
cs\install\dms.ear
cs\install\docApps.jar
cs\install\Documentum_DFC_Environment.iam.zip
cs\install\jboss711.zip
cs\install\ServerApps.ear
cs\install\serverSetup.bin
cs\install\Server_linux_ora.zip
cs\install\serviceWrapperManager.jar
cs\install\tanukisoftware.zip
cs\install\tcf.zip
cs\install\XhiveConnector.ear
db\oracle-xe-11.2.0-1.0.x86_64.rpm
db\config\init.ora -&gt; oracle xe config
db\config\initXETemp.ora -&gt; oracle xe config
db\config\startdb.sh -&gt; oracle xe startup script
db\config\xe.rsp -&gt; oracle xe config
db\instantclient_11_2\adrci
db\instantclient_11_2\BASIC_README
db\instantclient_11_2\genezi
db\instantclient_11_2\libclntsh.so.11.1
db\instantclient_11_2\libnnz11.so
db\instantclient_11_2\libocci.so.11.1
db\instantclient_11_2\libociei.so
db\instantclient_11_2\libocijdbc11.so
db\instantclient_11_2\ojdbc5.jar
db\instantclient_11_2\ojdbc6.jar
db\instantclient_11_2\uidrvci
db\instantclient_11_2\xstreams.jar
tomcat\config\catalina.properties -&gt; tomcat updated config files
tomcat\config\catalina.sh -&gt; tomcat modified startup script
tomcat\config\context.xml -&gt; tomcat updated config files
tomcat\config\server.xml -&gt; tomcat updated config files
tomcat\config\web.xml -&gt; tomcat updated config files
tomcat\install\apache-tomcat-8.0.14.tar.gz
tomcat\install\da.war

Step 5: Get latest centos as base OS

Open docker terminal and run:

docker pull centos:latest

From now on, we’ll be editing the Dockerfile that we’ll use to create the image

Step 6: Installing Oracle XE

We’ll be building and image based on the centos we’ve just pulled, so we start our Dockerfile with:

FROM centos

Now we need to setup user accounts:

RUN echo root:root | chpasswd
RUN useradd dmadmin
RUN passwd -f -u dmadmin

RUN echo “dmadmin ALL=(ALL) ALL” >> /etc/sudoers.d/dmadmin
RUN sed -i -e ‘s/Defaults requiretty.*/ #Defaults requiretty/g’ /etc/sudoers

Install required libraries:

RUN yum install -y passwd sudo tail libaio bc initscripts net-tools libXp.x86_64 libXp.i686 libXi.i686 libXtst.i686 libXt.i686 glibc.i686 libgcc.i686 libstdc++.i686 libaio.i686; \
yum clean all

And run the Oracle installation:

RUN mkdir -p /run/lock/subsys

ADD db/oracle-xe-11.2.0-1.0.x86_64.rpm /tmp/
RUN yum localinstall -y /tmp/oracle-xe-11.2.0-1.0.x86_64.rpm; \
rm -rf /tmp/oracle-xe-11.2.0-1.0.x86_64.rpm

ADD db/config/xe.rsp db/config/init.ora db/config/initXETemp.ora /u01/app/oracle/product/11.2.0/xe/config/scripts/
RUN chown oracle:dba /u01/app/oracle/product/11.2.0/xe/config/scripts/*.ora \
/u01/app/oracle/product/11.2.0/xe/config/scripts/xe.rsp
RUN chmod 755 /u01/app/oracle/product/11.2.0/xe/config/scripts/*.ora \
/u01/app/oracle/product/11.2.0/xe/config/scripts/xe.rsp

ENV ORACLE_HOME /u01/app/oracle/product/11.2.0/xe
ENV ORACLE_SID XE
ENV PATH $ORACLE_HOME/bin:$PATH
RUN /etc/init.d/oracle-xe configure responseFile=/u01/app/oracle/product/11.2.0/xe/config/scripts/xe.rsp

RUN echo oracle:oracle | chpasswd

those scripts have the Oracle configuration and you can get them from GitHub – madhead/docker-oracle-xe: CentOS 7 Docker image with Oracle XE 11.2.0 onboard

Configure instantclient:

RUN mkdir /u01/app/oracle/product/11.2.0/xe/lib32; \
chown oracle:dba /u01/app/oracle/product/11.2.0/xe/lib32

ADD db/instantclient_11_2/lib* /u01/app/oracle/product/11.2.0/xe/lib32/

RUN ln -s /u01/app/oracle/product/11.2.0/xe/lib32/libclntsh.so.11.1 /u01/app/oracle/product/11.2.0/xe/lib32/libclntsh.so; \
ln -s /u01/app/oracle/product/11.2.0/xe/lib32/libocci.so.11.1 /u01/app/oracle/product/11.2.0/xe/lib32/libocci.so; \
chown -h oracle:dba /u01/app/oracle/product/11.2.0/xe/lib32/*; \
chown -h oracle:dba /u01/app/oracle/product/11.2.0/xe/lib32/libclntsh.so; \
chown -h oracle:dba /u01/app/oracle/product/11.2.0/xe/lib32/libocci.so

And copy the db startup script to the image:

ADD db/config/startdb.sh /

Step 7: Installing Documentum 7.2

You need to get a copy of the silent install scripts, you can get them by running the dctm installers with “-r <path to file>” or by checking support.emc.com for a SN with an attached copy.

Just be sure to fill in the usual required fields and the AEK password option or the installer will fail (you can avoid using lockbox though)

Avoid problems with the Oracle client:

RUN usermod -a -G dba dmadmin

Create the folder structure and copy the installers and the configuration scripts:

RUN mkdir /opt/documentum; \
mkdir /opt/documentum/product; \
mkdir /opt/documentum/product/7.2; \
mkdir /opt/documentum/install; \
chown -R dmadmin:dmadmin /opt/documentum

ADD cs/install/* /opt/documentum/install/
ADD cs/config/installProperties.properties /opt/documentum/install/installProperties.properties
ADD cs/config/configProperties.properties /opt/documentum/install/configProperties.properties

Additional configurations before running the installer:

USER root
RUN echo “#dctm services” >> /etc/services ; \
echo “dctm72 49001/tcp # 7.2 Repository native connection” >> /etc/services ; \
echo “dctm72_s 49002/tcp # 7.2 Repository secure connection” >> /etc/services

RUN ln /usr/lib64/libsasl2.so.3 /usr/lib64/libsasl2.so.2

RUN chown -R dmadmin:dmadmin /opt/documentum/install; \
chmod u+x /opt/documentum/install/serverSetup.bin

USER dmadmin
WORKDIR $DOCUMENTUM

ENV DOCUMENTUM /opt/documentum
ENV DM_HOME $DOCUMENTUM/product/7.2
ENV ORACLE_HOME /u01/app/oracle/product/11.2.0/xe
ENV ORACLE_SID XE
ENV NLS_LANG AMERICAN_AMERICA.AL32UTF8
ENV PATH $ORACLE_HOME/bin:$DM_HOME/bin:$PATH
ENV LC_ALL C
ENV JAVA_HOME /opt/documentum/java64/1.7.0_72
ENV PATH $JAVA_HOME/bin:$ORACLE_HOME/bin:$DM_HOME/bin:$PATH
ENV LD_LIBRARY_PATH=$ORACLE_HOME/lib32:$DM_HOME/bin/FIPS/:$JAVA_HOME/jre/lib/amd64/server:$DM_HOME/bin:$LD_LIBRARY_PATH

And run CS install:

RUN $DOCUMENTUM/install/serverSetup.bin -f installProperties.properties

Let’s configure the repository. First, “fix” dmdbtest (bad, dirty fix)

RUN mv $DM_HOME/bin/dmdbtest $DM_HOME/bin/dmdbtest.bak; \
echo “exit 0” >> $DM_HOME/bin/dmdbtest; \
chmod u+x $DM_HOME/bin/dmdbtest

While building an image, docker generates intermediate containers. These containers are like individual VMs with their own configuration, so starting the DB and the installer in different docker commands makes the DB run in a different container than the installation, so the installer won’t be able to connect to Oracle. In order to avoid this problem we need to run everything in the same run command (dirty workaround). Also, update hostnames with the current container hostname:

RUN sed -i “/SERVER.PROJECTED_DOCBROKER_HOST/cSERVER.PROJECTED_DOCBROKER_HOST=$HOSTNAME” /opt/documentum/install/configProperties.properties; \
sed -i “/SERVER.SMTP_SERVER_NAME/cSERVER.SMTP_SERVER_NAME=$HOSTNAME” /opt/documentum/install/configProperties.properties; \
sed -i “/SERVER.FQDN/cSERVER.FQDN=$HOSTNAME” /opt/documentum/install/configProperties.properties; \
sudo -E /startdb.sh; \
/opt/documentum/product/7.2/install/dm_launch_server_config_program.sh -f /opt/documentum/install/configProperties.properties

Step 8: Installing Tomcat / DA 7.2

The configuration files are the same used in the (Unofficial) D7.2 Developer Edition, I simply copied those to avoid further manual modifications:

ADD tomcat/install/apache-tomcat-8.0.14.tar.gz /opt/

RUN mv /opt/apache-tomcat-8.0.14 /opt/tomcat; \
chown -R dmadmin:dmadmin /opt/tomcat

ADD tomcat/install/da.war /opt/tomcat/webapps/
RUN unzip /opt/tomcat/webapps/da.war -d /opt/tomcat/webapps/da; \
sed -i “/<compression_filter_enabled>true</compression_filter_enabled>/c<compression_filter_enabled>false</compression_filter_enabled>” /opt/tomcat/webapps/da/wdk/app.xml; \
rm /opt/tomcat/webapps/da.war
ADD tomcat/config/catalina.properties /opt/tomcat/conf/
ADD tomcat/config/context.xml /opt/tomcat/conf/
ADD tomcat/config/server.xml /opt/tomcat/conf/
ADD tomcat/config/web.xml /opt/tomcat/conf/
ADD tomcat/config/catalina.sh /opt/tomcat/bin/

Step 9: Exposing ports and configuring default command to be run:

EXPOSE 8080 1521

CMD /opt/documentum/startup-dctm.sh ; bash

Save and get ready to build the image!

Step 10: building the image

docker build -t dctm72 .

And wait 40-60 minutes

Step 11: Running the image

Now that everything is setup, just run the image:

docker run -it -p 8080:8080 dctm72

the startup-dctm.sh command will start the database listening to the container’s IP, update server.ini, dfc.properties with the new hostname, remove dfc.keystore (just to be sure), load the aek passphrase and start docbroker, repository, jms and tomcat.

You can run idql from the container to check that you can connect to the repository. Now point your host browser to the docker-machine ip (you can see the ip on the docker terminal or by running “docker-machine ip”) through the 8080 port and try to open DA and login using the usual dmadmin/dmadmin.

Everything should be (kind of) working, Congrats!

In the next post I’ll explain how to “split” this image in three different images (db, cs and tomcat)

(Unofficial) D2 4.6 Developer Edition

I had time to install the latest D2, and as usual, it wasn’t just “next, next, next, finish” so I took the chance to do a quick post

Environment

Required software

  • emc-dfs-sdk-7.2.zip
  • D2_4.6.0_P03.zip

D2 Installation

Installation

  • Stop Tomcat, JMS, Content Server and docbroker
  • Create the following folder structure:
    • $DOCUMENTUM/d2
    • $DOCUMENTUM/d2/install
    • $DOCUMENTUM/d2/dfs72
    • $DOCUMENTUM/d2/dar
    • $DOCUMENTUM/d2/d2-api
    • $DOCUMENTUM/d2/lockbox
  • Copy to the $DOCUMENTUM/d2/dfs72 the contents of emc-dfs-sdk-7.2.zip
  • Modify sdk’s dfc.properties to use the existing content server dfc.properties file

[dmadmin@vm-dctm72 d2]$ vi dfs72/etc/dfc.properties
#include /opt/documentum/config/dfc.properties

  • Copy to $DOCUMENTUM/d2/install the contents of D2_4.6.0_P03.zip

And let’s install D2:

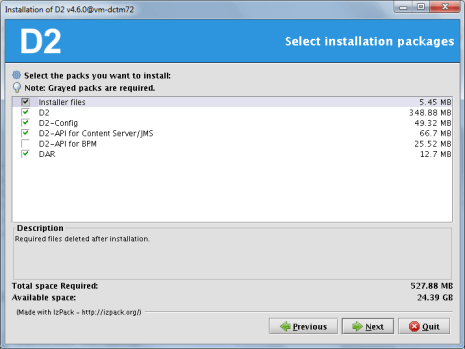
[dmadmin@vm-dctm72 install]$ java -jar D2-Installer-4.6.0.jar

Next screens are just “next, next, next”. Despite what the screens says, the installer won’t configure Lockbox anyway, but it will install the required files.

Also, the installer will most likely fail when installing the DAR files, pointing to a non-existing log file. Just ignore it, as it looks like the installer is unable to install the dar files, so we’ll be manually installing those later.

PostInstall Configuration

  • Set environment variables:

D2=$DOCUMENTUM/d2
export D2
D2_API=$D2/d2-api
export D2_API
D2_LOCKBOX=$D2/lockbox
export D2_LOCKBOX
PATH=$HOME/.local/bin:$HOME/bin:$JAVA_HOME/bin:$ORACLE_HOME/bin:$DM_HOME/bin:$D2_LOCKBOX/linux_gcc64_ia64:$PATH
export PATH
CLASSPATH=$D2_API/C6-Common.jar:$D2_API/LB.jar:$D2_API/LBJNI.jar
export CLASSPATH
LD_LIBRARY_PATH=$ORACLE_HOME/lib32:$DM_HOME/bin/FIPS/:$JAVA_HOME/jre/lib/amd64/server:$DM_HOME/bin:$D2_LOCKBOX/linux_gcc34_x64
export LD_LIBRARY_PATH

  • Create lockbox file:

[dmadmin@vm-dctm72 d2]$ java com.emc.common.java.crypto.SetLockboxProperty $D2 D2Method.passphrase <your passphrase>

  • Copy D2.lockbox to the JMS:

[dmadmin@vm-dctm72 d2]$ cp D2.lockbox /opt/documentum/jboss7.1.1/server/DctmServer_MethodServer/deployments/ServerApps.ear/APP-INF/classes/

  • Create the following folder:

[dmadmin@vm-dctm72 d2]$ mkdir -p /opt/documentum/jboss7.1.1/modules/emc/d2/lockbox/main

  • Copy LB.jar and LBJNI.jar to that folder:

[dmadmin@vm-dctm72 d2]$ cp LB* /opt/documentum/jboss7.1.1/modules/emc/d2/lockbox/main/

  •  Create a module.xml file with the following content:

[dmadmin@vm-dctm72 d2]$ vi /opt/documentum/jboss7.1.1/modules/emc/d2/lockbox/main/module.xml
<module xmlns=”urn:jboss:module:1.1″ name=”emc.d2.lockbox”>
<resources>
<resource-root path=”LB.jar” />
<resource-root path=”LBJNI.jar” />
</resources>
</module>

  • Edit jboss-deployment-structure.xml and add the following section inside the deployments node:

[dmadmin@vm-dctm72 d2]$ vi /opt/documentum/jboss7.1.1//server/DctmServer_MethodServer/deployments/ServerApps.ear/META-INF/jboss-deployment-structure.xml
<dependencies>
<module name=”emc.d2.lockbox”/>
</dependencies>

  •  And the following to the exclusions section:

<module name=”org.slf4j” />
<module name=”org.slf4j.impl” />
<module name=”org.hibernate” />

  • Copy LB.jar and LBJNI.jar to tomcat’s lib folder:

[dmadmin@vm-dctm72 d2]$ cp LB* /opt/tomcat8/lib/

  •  Edit lockboxPath property from D2-Config/WEB-INF/classes/D2-Config.properties and D2/WEB-INF/classes/D2FS.properties to point to $D2 (use the actual path):

lockboxPath=/opt/documentum/d2

Dar Installation

  • Install the following DARs:

D2-DAR.dar

[dmadmin@vm-dctm72 dar]$ java -Ddar=$D2/dar/D2-DAR.dar -Dlogpath=$D2/dar/D2-DAR.log -Ddocbase=dctm72 -Duser=dmadmin -Ddomain= -Dpassword=dmadmin -cp $DM_HOME/install/composer/ComposerHeadless/startup.jar org.eclipse.core.launcher.Main -data $DM_HOME/install/composer/workspace -application org.eclipse.ant.core.antRunner -buildfile $DM_HOME/install/composer/deploy.xml

D2Widget-DAR.dar

[dmadmin@vm-dctm72 dar]$ java -Ddar=$D2/dar/D2Widget-DAR.dar -Dlogpath=$D2/dar/D2Widget-DAR.log -Ddocbase=dctm72 -Duser=dmadmin -Ddomain= -Dpassword=dmadmin -cp $DM_HOME/install/composer/ComposerHeadless/startup.jar org.eclipse.core.launcher.Main -data $DM_HOME/install/composer/workspace -application org.eclipse.ant.core.antRunner -buildfile $DM_HOME/install/composer/deploy.xml

Collaboration_Services.dar

[dmadmin@vm-dctm72 dar]$ java -Ddar=$D2/dar/Collaboration_Services.dar -Dlogpath=$D2/dar/Collaboration_Services.log -Ddocbase=dctm72 -Duser=dmadmin -Ddomain= -Dpassword=dmadmin -cp $DM_HOME/install/composer/ComposerHeadless/startup.jar org.eclipse.core.launcher.Main -data $DM_HOME/install/composer/workspace -application org.eclipse.ant.core.antRunner -buildfile $DM_HOME/install/composer/deploy.xml

  • Start docbroker, Content, JMS, Tomcat and (hopefully) everything should start fine (check JMS’ log as we’ve been messing with its configuration and anything out of place will cause it to fail)