D2 Config zip export without D2-Config

In a previous post I explained how to perform a full import of the D2 configuration without using D2-Config (D2-Config without ActiveX). You can also export the D2-Configuration to a XML file by using the bundled d2configutils in D2-Config. But how about exporting a full D2-Config as a zip file (including images, etc.)?. Well, here you go:

getSManager();
session=sm.getSession("repository");

D2Session.initTBOEx(session,false);
D2Config config=new D2Config(session);

//this will place the zip file in your temp folder
File zipConfigfile = config.getZipExport(null, null, false, new ArrayList());

sm.release(session);

If you want to export just a single application/configuration, just change the second parameter to the name of your application/configuration.


DCTM 16.4 Docker+Oracle installation guide

Since v16.4, Opentext doesn’t provide a “preconfigured” Docker image for Documentum running on Oracle. If you want to use a docker image running PostgreSQL you can use the same procedure as described for Full docker CS7.3 PostgreSQL + D2 4.7 installation guide or DCTM 7.3 PostgreSQL with Docker install guide, and you should not have too many issues 😀

This guide will help you setup a VM running CentOS 7 where we will install Oracle (Express) and docker, and will be building a Documentum image. We will split the build in several images to avoid having to do a full rebuild if something goes wrong 😀

Environment

Host:
Windows 10 x64 8GB RAM
VMware Workstation Player 12

Guest:
CentOS 7 x64 25GB HD 4GB RAM 2 cores
Docker 1.13.1

VM Creation

Mount the CentOS 7 DVD image, boot the machine and follow the steps. You can choose to let EasyInstall do the work for you. I used minimal package install to save resources, named the machine vm-dctmdocker, configure the network and set the root password.

Oracle XE setup

  • I copied every installer in $DOCUMENTUM/installers, so:

[dmadmin@vm-dctmdocker opt]$ sudo mkdir documentum
[dmadmin@vm-dctmdocker opt]$ sudo chown dmadmin.dmadmin documentum
[dmadmin@vm-dctmdocker documentum]$ mkdir installers
[dmadmin@dctmdocker installers]$ cp /mnt/hgfs/dctm72/oracle-xe-11.2.0-1.0.x86_64.rpm/Disk1/oracle-xe-11.2.0-1.0.x86_64.rpm .

  • Install needed libraries, run installer, run configuration tool (remember to change the default 8080 port to something else to avoid conflicts with tomcat if you want to use an application server):

[dmadmin@vm-dctmdocker installers]$ sudo yum install libaio bc
[dmadmin@vm-dctmdocker installers]$ sudo rpm -ivh oracle-xe-11.2.0-1.0.x86_64.rpm
[dmadmin@vm-dctmdocker installers]$ sudo /etc/init.d/oracle-xe configure

  • Launch sqlplus to enable remote access and remove the password expiration:

[dmadmin@vm-dctmdocker installers]$ . /u01/app/oracle/product/11.2.0/xe/bin/oracle_env.sh

[dmadmin@vm-dctmdocker installers]$ /u01/app/oracle/product/11.2.0/xe/bin/sqlplus system
EXEC DBMS_XDB.SETLISTENERLOCALACCESS(FALSE);
ALTER PROFILE DEFAULT LIMIT PASSWORD_LIFE_TIME UNLIMITED;
quit

Docker setup

We’ll just install docker, adding dmadmin user to the docker group so we don’t need to use sudo every time we want to run the “docker” command

[dmadmin@vm-dctmdocker installers]$ sudo yum install docker
[dmadmin@vm-dctmdocker installers]$ sudo usermod -a -G docker dmadmin
[dmadmin@vm-dctmdocker installers]$ systemctl restart docker.service

Centos docker image setup

This base image will just add required packages and minor configurations:

[dmadmin@vm-dctmdocker installers]$ docker pull centos
[dmadmin@vm-dctmdocker installers]$ docker build –no-cache -f ./customCentosDockerfile -t custom_centos .

customCentosDockerfile:

FROM centos

MAINTAINER aldago

RUN echo root:root | chpasswd

RUN yum install -y rng-tools.x86_64 unzip libaio sudo tail vi openssh-server; \
yum clean all; \
sed -i ‘s/PermitRootLogin without-password/PermitRootLogin yes/’ /etc/ssh/sshd_config; \
sed ‘s@session\s*required\s*pam_loginuid.so@session optional pam_loginuid.so@g’ -i /etc/pam.d/sshd

RUN /sbin/rngd -b -r /dev/urandom -p /dev/random

Documentum base image setup

This image will install Documentum binaries and Oracle client:

[dmadmin@vm-dctmdocker installers]$ docker build –no-cache -f ./dctmcentosDockerfile -t centos_dctm .

Dockerfile:

FROM custom_centos

MAINTAINER aldago

RUN echo root:root | chpasswd

ADD db/install/oracle-instantclient11.2-sqlplus-11.2.0.3.0-1.x86_64.rpm /tmp/oracle-instantclient11.2-sqlplus-11.2.0.3.0-1.x86_64.rpm
ADD db/install/oracle-instantclient11.2-basic-11.2.0.3.0-1.x86_64.rpm /tmp/oracle-instantclient11.2-basic-11.2.0.3.0-1.x86_64.rpm

RUN rpm -ivh /tmp/oracle-instantclient11.2-sqlplus-11.2.0.3.0-1.x86_64.rpm /tmp/oracle-instantclient11.2-basic-11.2.0.3.0-1.x86_64.rpm; \
rm /tmp/oracle-instantclient11.2-sqlplus-11.2.0.3.0-1.x86_64.rpm; \
rm /tmp/oracle-instantclient11.2-basic-11.2.0.3.0-1.x86_64.rpm

## create dmadmin user
RUN useradd dmadmin; \
passwd -f -u dmadmin; \
mkdir -p /home/dmadmin/.ssh; chown dmadmin /home/dmadmin/.ssh; chmod 700 /home/dmadmin/.ssh; \
echo “dmadmin ALL=(ALL) ALL” >> /etc/sudoers.d/dmadmin; \
sed -i -e ‘s/Defaults requiretty.*/ #Defaults requiretty/g’ /etc/sudoers

# Create folder structure
RUN mkdir /opt/documentum; \
mkdir /opt/documentum/product; \
mkdir /opt/documentum/product/16.4; \
mkdir /opt/documentum/install; \
mkdir /opt/documentum/db; \
chown -R dmadmin:dmadmin /opt/documentum

ADD cs/install/* /opt/documentum/install/
ADD cs/config/installProperties.properties /opt/documentum/install/
ADD cs/config/configProperties.properties /opt/documentum/install/
ADD cs/config/configPropertiesDoc.properties /opt/documentum/install/

ADD db/config/tnsnames.ora /opt/documentum/db/
ADD db/config/fix_tnsnames.sh /opt/documentum/
RUN chown dmadmin.dmadmin /opt/documentum/fix_tnsnames.sh; \
chown dmadmin.dmadmin /opt/documentum/db/tnsnames.ora; \
chmod u+x /opt/documentum/fix_tnsnames.sh; \
chmod u+g /opt/documentum/db/tnsnames.ora

RUN echo “#dctm services” >> /etc/services ; \
echo “dctm164 49001/tcp # 16.4 Repository native connection” >> /etc/services ; \
echo “dctm164_s 49002/tcp # 16.4 Repository secure connection” >> /etc/services ; \
ln /usr/lib64/libsasl2.so.3 /usr/lib64/libsasl2.so.2; \
ln -s /usr/lib/oracle/11.2/client64/lib/libclntsh.so.11.1 /usr/lib/oracle/11.2/client64/lib/libclntsh.so; \
ln -s /usr/lib/oracle/11.2/client64/lib/libocci.so.11.1 /usr/lib/oracle/11.2/client64/lib/libocci.so; \
chown -R dmadmin:dmadmin /opt/documentum/install; \
chmod u+x /opt/documentum/install/serverSetup.bin

USER dmadmin

ENV DOCUMENTUM /opt/documentum
ENV DM_HOME $DOCUMENTUM/product/16.4
ENV LC_ALL C
ENV JAVA_HOME /opt/documentum/java64/1.8.0_152
ENV ORACLE_HOME /usr/lib/oracle/11.2/client64
ENV ORACLE_SID XE
ENV PATH $ORACLE_HOME/bin:$DM_HOME/bin:$PATH
ENV NLS_LANG AMERICAN_AMERICA.AL32UTF8
ENV LD_LIBRARY_PATH=/usr/lib/oracle/11.2/client64/lib:$DM_HOME/bin/FIPS/:$JAVA_HOME/jre/lib/amd64/server:$DM_HOME/bin:$LD_LIBRARY_PATH
ENV R_SHLIB_LD_LIBRARY_PATH=$DM_HOME/bin/FIPS
ENV PATH=/usr/lib/oracle/11.2/client64/bin:$PATH
ENV TNS_ADMIN=/opt/documentum/db

RUN $DOCUMENTUM/install/serverSetup.bin -f installProperties.properties

ENV DBHOST 192.168.231.135

RUN /opt/documentum/fix_tnsnames.sh; \
mv $DM_HOME/bin/dmdbtest $DM_HOME/bin/dmdbtest.bak; \
echo “exit 0” >> $DM_HOME/bin/dmdbtest; \
chmod u+x $DM_HOME/bin/dmdbtest

EXPOSE 22

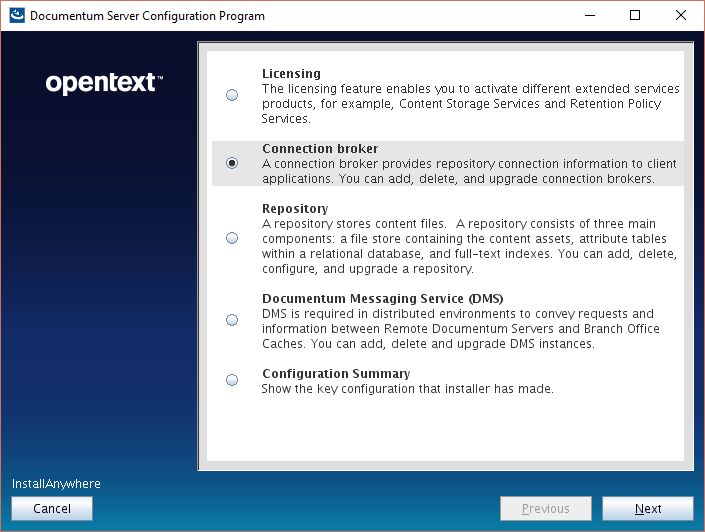
Documentum repository:

This image will run the repository configuration:

[dmadmin@vm-dctmdocker installers]$ docker build –no-cache -t dctm164 .

Dockerfile:

FROM centos_dctm

MAINTAINER aldago

USER dmadmin

ENV DBHOST 192.168.231.135

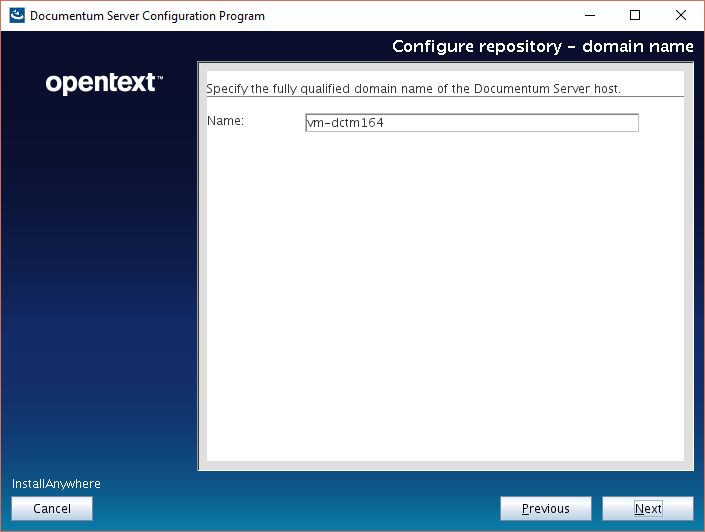
RUN sed -i “/SERVER.PROJECTED_DOCBROKER_HOST/cSERVER.PROJECTED_DOCBROKER_HOST=$HOSTNAME” /opt/documentum/install/configProperties.properties; \
sed -i “/SERVER.SMTP_SERVER_NAME/cSERVER.SMTP_SERVER_NAME=$HOSTNAME” /opt/documentum/install/configProperties.properties; \
sed -i “/SERVER.FQDN/cSERVER.FQDN=$HOSTNAME” /opt/documentum/install/configProperties.properties; \
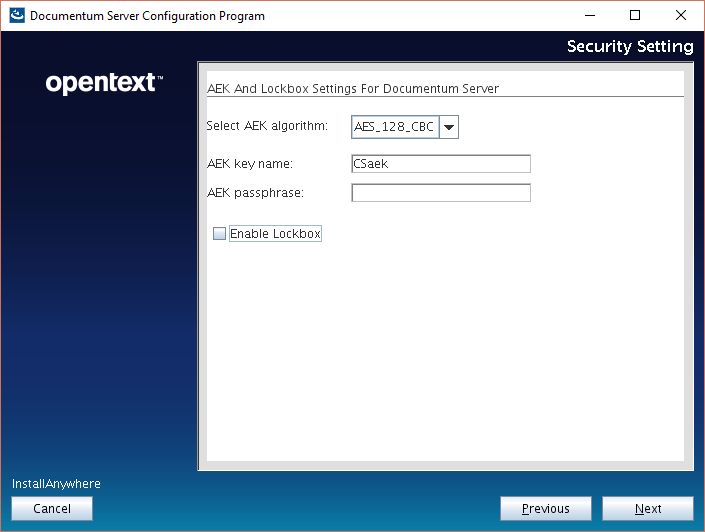
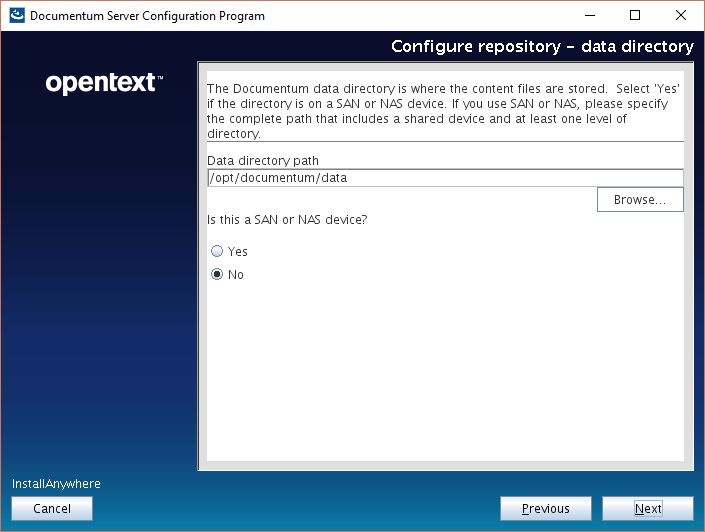
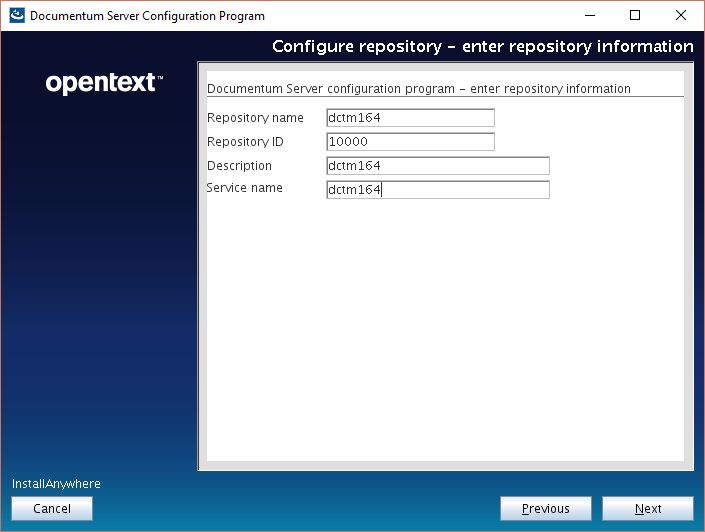
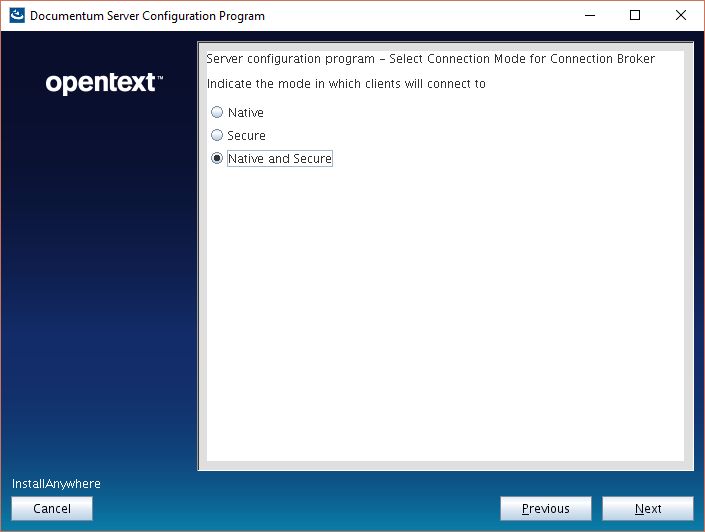
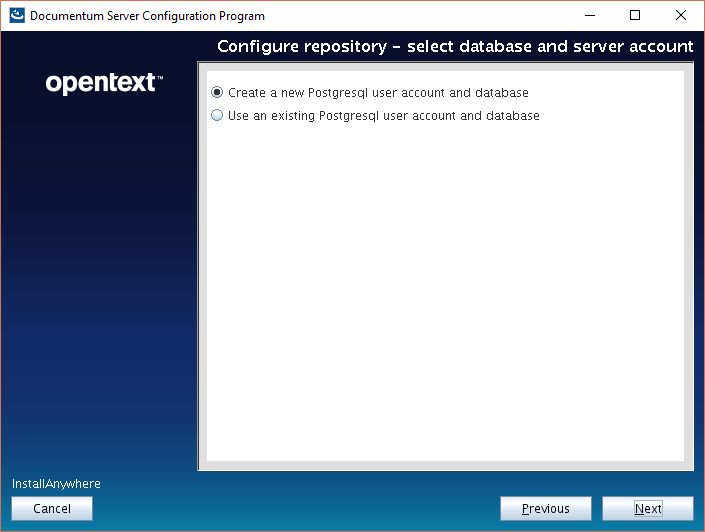
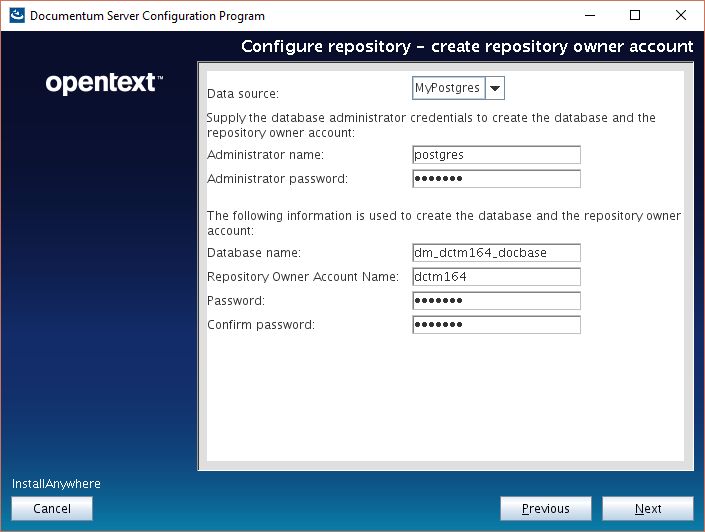
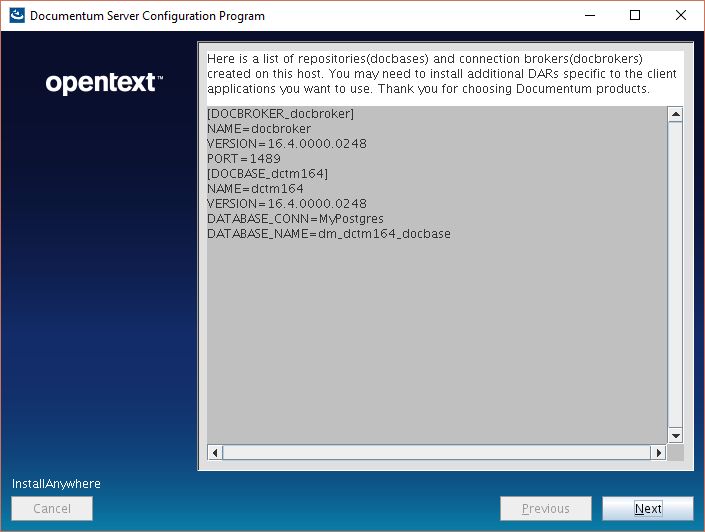
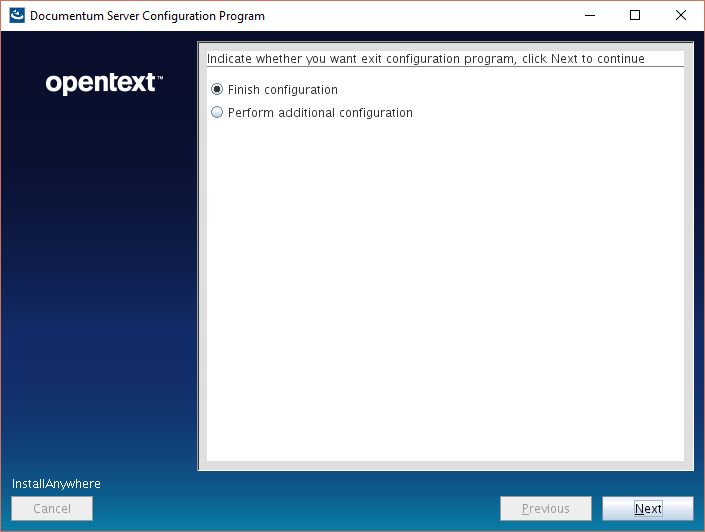
/opt/documentum/product/16.4/install/dm_launch_server_config_program.sh -f /opt/documentum/install/configProperties.properties

RUN sed -i “/dfc.session.secure_connect_default/cdfc.session.secure_connect_default=try_native_first” /opt/documentum/config/dfc.properties

EXPOSE 22 1489 1492 49001 49002

ADD cs/config/startup-dctm.sh /opt/documentum/startup-dctm.sh

USER root
RUN chown dmadmin.dmadmin /opt/documentum/startup-dctm.sh; \
chmod u+x /opt/documentum/startup-dctm.sh

USER dmadmin
CMD /opt/documentum/fix_tnsnames.sh; /opt/documentum/startup-dctm.sh ; bash

Additional information

Custom scripts created for the install:

  • startup-dctm.sh: updates hostname, dfc.properties, runs dm_crypto_boot and starts the repository services.
  • fix_tnsnames.sh: updates tnsnames with Oracle server public IP (which in this example is hardcoded)
  • configProperties.properties: Standard silent install script

If something goes wrong at some point, remember you’ll need to:

  • Delete docker dangling containers
  • Delete user created on database by the installer
  • Delete tablespaces created on database by the installer


Multiple environments with Composer

Similar to the previous posts about configuring dqMan/DQLTester (Multiple environments with dqMan/DQLTester) and tomcat (Multiple environments with Tomcat/DA), Composer can be launched the same way:

Folder structure:

  • composer.bat
  • properties
    • env1
      • dev
        • dfc.properties
      • prod
        • dfc.properties
    • env2
      • dev
        • dfc.properties
      • prod
        • dfc.properties
  • etc.

Composer.bat:

@Echo off
SETLOCAL ENABLEEXTENSIONS

SET composerfolder=path to composer folder<span id="mce_SELREST_start" style="overflow:hidden;line-height:0;">&#65279;</span>
SET folderbase=dfcproperties
SET parambase=-Ddfc.properties.file=

echo ****************
echo 1. env1 dev
echo 2. env2 prod
...
echo ****************

SET /p var= ^&gt; Choose option:

if "%var%"=="1" goto op1
if "%var%"=="2" goto op2
...

:op1
SET JAVA_TOOL_OPTIONS=%parambase%%cd%\%folderbase%\env1\dev\dfc.properties
goto finish

:op2
SET JAVA_TOOL_OPTIONS=%parambase%%cd%\%folderbase%\env1\prod\dfc.properties
goto finish
...

:finish

start "" /D %composerfolder% /B %composerfolder%\composer.exe
cls&amp;exit

D2-Config without ActiveX

If somehow you find yourself working for a customer with very strict security policies that don’t allow ActiveX components, you can still work with D2-Config even if you cannot install the activex component.

You can access /D2-Config/ConnectDialog.html, ignore the popups and login as usual, then you’ll be redirected to /D2-Config/interface.html?interfaceId=null# which is the page with D2-Config matrix.

Every time you click somewhere you’ll get a popup stating the C6 ActiveX is not loaded but you can simply ignore it, as most of the application will work.

If you need to perform a full import of a configuration, you can do so with the following code (note that this will reset D2-Config configurations):

getSManager();
session=sm.getSession("repository");

D2Session.initTBOEx(session,false);
D2Config config=new D2Config(session);

config.importZip(new File("full path to Zip file with configuration"),
true, null, null, true, true, null);

Map arguments = new HashMap();
arguments.put("-callerUrl", "http://server/D2/");
arguments.put("-all", Boolean.TRUE);
D2Method.start(session, D2RefreshCacheMethod.class, arguments);

sm.release(session);

You’ll need to add to your project d2-api.jar and c6-common.jar, mark as approved the dfc instance used by the program’s dfc, and set the java.security parameter as explained in D2 4.7/16.4 configuration in eclipse

D2 4.7/16.4 configuration in eclipse

This post is quite similar to the Debugging D2 4.5/4.6 previously posted, explaining how to set up D2 without lockbox, but much more simple due to the missing lockbox.

Extract all files from D2/D2-Config to a local folder in your computer, configure a new (tomcat) server in Eclipse, and configure the following parameters:

  • JVM arguments:
    • -Djava.io.tmpdir=”<absolute path to some temp folder>\d2″ (make sure this folder exists)
    • -Djava.security.policy=file:///<absolute path to java.policy file> (the documentation states to change java.policy in your JRE, but I rather use this cleaner solution: create a local java.policy file with a single line:

      grant { permission com.documentum.fc.client.impl.bof.security.RolePermission “*”, “propagate”;}; and reference it with the java.security.policy parameter)

    • Additional memory/custom parameters

Now, start the server, take note of the dfc.keystore id, mark it as approved privilege client in DA and you are good to go.

OTEW 2018 fun

I’m not attending the event being held in Toronto, but I found through twitter this nice url:

http://hol-host05.eastus.cloudapp.azure.com:81/d2-unity-web/ui/app.html -> This is the new D2 UI (and yes, you can use the you-know-which-default-user(s) to log in and check it by yourself) deployed on Azure (which is weird, considering Opentext has its own cloud…)

But, the really funny thing here, are these urls:

http://hol-host05.eastus.cloudapp.azure.com:81/da -> da 7.3 (but with CS 16.4/SQL Server)

http://hol-host05.eastus.cloudapp.azure.com:81/D2 -> hello old D2 vulnerabilities 🙂

http://hol-host05.eastus.cloudapp.azure.com:81/d2-unity-web/repositories -> and you can log in with you-know-which-default-user(s), and you have a nice DQL tool provided by REST services 🙂

Opentext iHub integration with Documentum

One of the new features of Documentum 16.4 is the integration with Opentext’s iHub analytics software. If you don’t know what iHub is, it’s something like a preconfigured set of reports (if you’ve used Jasper Reports, it’s quite similar) which now comes with a bundled OOTB reports for Documentum.

I’ve been trying to set it up in a test environment just to check it out but I’ve been having some problems.

Even though the installation is quite straightforward for some reason it refused to work, and it was impossible to login into the application. After discarding me as the problem, I pinpoint the error to the login info sent to Documentum.  This information is configured in the dctm_ihub_user_map.json file, which the documentation states, has the following format:

If you want to have a separate user mapping between Documentum and iHub user, then add a new entry (in bold) as in the following example:
{
“DEFAULT VOLUME”: {
“name”: “Default Volume”,
“users”: {
“DEFAULT_USER”: {
“name”: “Administrator”,
“password”: “”
381
Documentum Administrator
},
“dmadmin”: {
“name”: “dmadmin”,
“password”: “”
},
“dctm_testuser”: {
“name”: “ihub_testuser”,
“password”: “testpassword”
}
}
}
}

I was sure something was wrong there, so I decompiled the classes that read that file and, oh surprise:

DvrIPSE.IPSEUser localIPSEUser = (DvrIPSE.IPSEUser)localMap.get(paramString2.toUpperCase());

I guess I’ll be filling a “documentation bug”…

Opentext Documentum 16.4 PostgreSQL Developer Edition

This is a step-by-step guide to install Documentum 16.4 in a Linux environment with PostgreSQL 9.6 (as we don’t have/I haven’t found the compatibility matrix, I’ve used the same version bundled in the docker image).

Environment

Host:
Windows 10 x64 8GB RAM
VMware Workstation Player 12

Guest:
CentOS 7 x64 25GB HD 4GB RAM 2 cores
PostgreSQL 9.6
Documentum 16.4

VM Creation

Mount the CentOS 7 DVD image, boot the machine and follow the steps. You can choose to let EasyInstall do the work for you. I used minimal package install to save resources, named the machine vm-dctm16.4, configured the network and set the root password as well as a “dmadmin” user.

OS Configuration

  • Install required packages:

[dmadmin@vm-dctm164 ~]$ sudo yum install bash-completion kernel-devel rng-tools.x86_64
[dmadmin@vm-dctm164 ~]$ sudo yum install bash-completion kernel-devel rng-tools.x86_64 policycoreutils policycoreutils-python selinux-policy selinux-policy-targeted libselinux-utils setroubleshoot-server setools setools-console mcstrans expect tcl
[dmadmin@vm-dctm164 ~]$ sudo yum group install X\ Window\ System “Development Tools”
[root@vm-dctm164 vmtools]# yum install open-vm-tools.x86_64

  • Stop and disable the firewalld service:

[dmadmin@vm-dctm164 ~]$ sudo systemctl disable firewalld
Removed symlink /etc/systemd/system/multi-user.target.wants/firewalld.service.
Removed symlink /etc/systemd/system/dbus-org.fedoraproject.FirewallD1.service.
[dmadmin@vm-dctm164 ~]$ sudo systemctl stop firewalld

  • Configure the entropy and allow http connections through selinux:

[dmadmin@vm-dctm164 ~]$ sudo /sbin/rngd -b -r /dev/urandom -p /dev/random
[dmadmin@vm-dctm164 ~]$ sudo setsebool -P httpd_can_network_connect_db 1

PostgreSQL Configuration

  • Install required packages:

[dmadmin@vm-dctm164 ~]$ sudo yum install https://download.postgresql.org/pub/repos/yum/9.6/redhat/rhel-7.4-x86_64/pgdg-centos96-9.6-3.noarch.rpm
[dmadmin@vm-dctm164 ~]$ sudo yum install postgresql96-server postgresql96-contrib

  • Init the DB:

[dmadmin@vm-dctm164 ~]$ sudo /usr/pgsql-9.6/bin/postgresql96-setup initdb

  • Enable and start the PostgreSQL service:

[dmadmin@vm-dctm164 ~]$ sudo systemctl enable postgresql-9.6
Created symlink from /etc/systemd/system/multi-user.target.wants/postgresql-9.6.service to /usr/lib/systemd/system/postgresql-9.6.service.
[dmadmin@vm-dctm164 ~]$ sudo systemctl start postgresql-9.6

  • Configure the postgres user:

[dmadmin@vm-dctm164 ~]$ su – root
[root@vm-dctm164 ~]# su – postgres
-bash-4.2$ psql
postgres=# \password postgres
postgres=# \q
-bash-4.2$ exit
logout

  • Configure PostgreSQL:

[root@vm-dctm164 ~]# vi /var/lib/pgsql/9.6/data/postgresql.conf
listen_addresses = ‘*’
port = 5432

[root@vm-dctm164 ~]# vi /var/lib/pgsql/9.6/data/pg_hba.conf
host    all             all             127.0.0.1/32            md5
host all all ::/128 md5
host    all             all             vm-dctm164              md5

  • Restart PostgreSQL service to apply the changes:

[dmadmin@vm-dctm164 /]$ sudo systemctl restart postgresql-9.6

phpPgAdmin Configuration

  • Install required packages:

[dmadmin@vm-dctm164 /]$ sudo yum install phpPgAdmin httpd

  • Configure phpPgAdmin:

[dmadmin@vm-dctm164 /]$ sudo vi /etc/httpd/conf.d/phpPgAdmin.conf

# Apache 2.4
Require all granted
#Require host example.com

# Apache 2.2
Order deny,allow
 Allow from all
# Allow from 127.0.0.1
# Allow from ::1
# Allow from .example.com

[dmadmin@vm-dctm164 /]$ sudo vi /etc/phpPgAdmin/config.inc.php
$conf[‘servers’][0][‘host’] = ‘’;
$conf[‘extra_login_security’] = false;
$conf[‘owned_only’] = true;

  • Restart httpd service to apply the changes:

[dmadmin@vm-dctm164 /]$ sudo systemctl restart httpd

Now you should be able to login to the console from http://vm-dctm164/phpPgAdmin/

ODBC Configuration

  • Install required packages:

sudo yum install postgresql96-odbc.x86_64 unixODBC.x86_64

  • Configure .ini files:

[dmadmin@vm-dctm164 /]$ sudo vi /etc/odbcinst.ini
[PostgreSQL]
Description     = ODBC for PostgreSQL
#Driver         = /usr/lib/psqlodbcw.so
#Setup          = /usr/lib/libodbcpsqlS.so
#Driver64       = /usr/lib64/psqlodbcw.so
#Setup64                = /usr/lib64/libodbcpsqlS.so
Driver = /usr/pgsql-9.6/lib/psqlodbcw.so
Driver64 = /usr/pgsql-9.6/lib/psqlodbcw.so
Setup64 = /usr/lib64/libodbcpsqlS.so
FileUsage       = 1

[dmadmin@vm-dctm164 /]$ sudo vi /etc/odbc.ini
[MyPostgres]
Description=PostgreSQL
Driver=PostgreSQL
Database=postgres
Servername=vm-dctm164
UserName=postgres
Password=dmadmin
Port=5432
Protocol=7.4
ReadOnly=No
RowVersioning=No
ShowSystemTables=No
ShowOidColumn=No
FakeOidIndex=No
UpdateableCursors=Yes
DEBUG=Yes

  • Test the connection:

[dmadmin@vm-dctm164 /]$ isql -v MyPostgres
+—————————————+
| Connected!                            |
|                                       |
| sql-statement                         |
| help [tablename]                      |
| quit                                  |
|                                       |
+—————————————+
SQL> quit

Documentum server

  • Create folders:

[dmadmin@vm-dctm164 opt]$ sudo mkdir documentum
[dmadmin@vm-dctm164 opt]$ sudo chown dmadmin.dmadmin documentum
[dmadmin@vm-dctm164 opt]$ mkdir documentum/product
[dmadmin@vm-dctm164 opt]$ mkdir documentum/product/16.4
[dmadmin@vm-dctm164 opt]$ mkdir documentum/shared

  • Set up environment variables:

[dmadmin@vm-dctm164 ~]$ vi ~/.bash_profile
DOCUMENTUM=/opt/documentum
export DOCUMENTUM

DM_HOME=$DOCUMENTUM/product/16.4
export DM_HOME

POSTGRESQL_HOME=/usr/pgsql-9.6
export POSTGRESQL_HOME

PATH=$PATH:$DM_HOME/bin:$POSTGRESQL_HOME/bin:$HOME/.local/bin:$HOME/bin
export PATH

LC_ALL=C
export LC_ALL

LD_LIBRARY_PATH=$POSTGRESQL_HOME/lib:$DM_HOME/bin:$DOCUMENTUM/java64/JAVA_LINK/jre/lib/amd64/server:$LD_LIBRARY_PATH
export LD_LIBRARY_PATH

  • Reserve ports for services:

[dmadmin@vm-dctm164 opt]$ sudo vi /etc/services
dctm164         50000/tcp               # dctm 16.4 repo
dctm164_s       50001/tcp               # dctm 16.4 repo

  • Create symbolic link for later (configuration program):

[dmadmin@vm-dctm164 opt]$ sudo ln -s /usr/lib64/libsasl2.so.3.0.0 /usr/lib64/libsasl2.so.2

  • Configure limits.conf:

[dmadmin@vm-dctm164 opt]$ sudo vi /etc/security/limits.conf
dmadmin – core -1

  • Run the installer:

[dmadmin@vm-dctm164 cs]$ tar xvf content_server_16.4_linux64_postgres.tar
[dmadmin@vm-dctm164 cs]$ chmod 777 serverSetup.bin
[dmadmin@vm-dctm164 cs]$ ./serverSetup.bin

image7

image2

image3

image4

image5image6

Docbroker and repository

At this point, you can choose to run dmdbtest to make sure everything works. This versions seems to work with the OOTB libs from postgres and you don’t have to get the unstripped libs from the docker release.

  • Create the tablespace file for the repository (dctm164):

[dmadmin@vm-dctm164 cs]$ su –
[root@vm-dctm164 ~]# su – postgres
-bash-4.2$ mkdir /var/lib/pgsql/9.6/data/db_dctm164_dat.dat

image7

image8image9image10image11image12image13image14image15image16image17image18image19image20image21image22image23image24image25image26image27image28

Documentum Administrator

Nothing special about this, same procedure as always. I’ve used the latest tomcat 8 to deploy, as there are no requirements/supported versions matrix:

image29


Some notes:

  • Documentation seems more “precise”, specially regarding the Linux install. However, there are still copy/paste sections from previous releases.
  • Only new (visible) feature in DA is the integration with iHub
  • Firefox extension doesn’t work in Firefox 60