What does this mean to Documentum? Well, if your Webtop/D2 is using applets (UCF), starting March, you’ll only be able to use it with IE11 and older versions, as no other major browser (actually, Firefox is the only “major” browser that still allows NPAPI plugins, but this is due to their slow pace of development) will allow NPAPI plugins (Java).
Documentum is now OpenText
D2 (and Webtop and xCP) CTF
CTF (Content Transfer Framework) is how EMC Dell calls their “new UCF”. It works as a browser extension, and is the same extension you’ve used for the latest version of Webtop (new functionality getting first to Webtop? LOL). And this mode is not the default (why?) so you’ll need to change it in the settings.properties file of D2.
Also, this extension will generate some “index” files on the folder where you download files:
- .checkout.xml
- .d2_edit_storage.json
- .d2_view_storage.json
- .view.xml
That contain object names, ids, operation performed, and folder paths of the files transferred.
Tested on latest Firefox Nightly x64 and Chrome.
FYI, I’m pasting the “wonderful” ASCII compatibility matrix provided by Dell in the configuration file:
# +——————-+——+——+——+——+
# | Browser:OS \ Mode | Thin | Java | ctf | Note |
# +——————-+——+——+——+——+
# | IE 11 | yes | yes | yes | |
# +——————-+——+——+——+——+
# | Edge | yes | NO | NO | (1) |
# +——————-+——+——+——+——+
# | Firefox | yes | yes | yes | |
# +——————-+——+——+——+——+
# | Chrome | yes | NO | yes | (1) |
# +——————-+——+——+——+——+
# | Safari:Mac_OSX | yes | yes | yes | |
# +——————-+——+——+——+——+
# | Safari:Mac_IOS | yes | NO | NO | (2) |
# +——————-+——+——+——+——+
# Notes:
#
# (1) Chrome and Edge do not support java applets, and Edge does not support the CTF plugin.
# D2 will fallback to thin client mode appropriately when java or ctf has been
# specified in the value of the browser.plugin.mode setting as described above.
#
# (2) If browser.plugin.mode contains java or ctf, then D2 will silently continue to run in
# thin client mode. Safari running on Mac_IOS does not support the java or ctf plugin.
- Prompt for installing the extension:

- View content prompt:

- Edit:

- Check in:

Say goodbuy LockBox. Part II
I thought about this yesterday while I was configuring d2 4.7 with docker 😀
Full docker CS7.3 PostgreSQL + D2 4.7 installation guide
Some thoughts on this before the guide:
EMCDell keeps messing the documentation. Still there are mistakes, lack of information and some misleading procedures. Anyway, with time and by trial-error method, you can set up the environment “quickly”.
- Oh, the consistency! Dockerized D2 uses 3 containers (plus Documentum Administrator)
- Content Server with D2 files (on CentOS)
- D2 Config (Ubuntu)
- D2 Client (Ubuntu)
Why they start with a CentOS and then move to Ubuntu is beyond my understanding, but I would like to know if there’s some technical reasons for this. Also, do we really need a different content server image for using D2?
- I’m sure there are easier methods to configure everything, but well, for the “first” dockerized version we shouldn’t ask for much more…
Let’s go!
Environment
Host:
Windows 10 x64 8GB RAM
VMware Workstation Player 12
Guest:
CentOS 7 x64 25GB HD 4GB RAM 2 cores
Docker 1.12
I’ve used the same VM I created in DCTM 7.3 PostgreSQL with Docker install guide, just remember to stop the PostgreSQL and httpd services to avoid conflics.
PostgreSQL 9.6.1
You can follow the instructions in https://hub.docker.com/_/postgres/ to configure the postgres container:
- Download the image:
[dmdocker@vm-dctm73 installers]$ docker pull postgres
- Start the container:
[dmdocker@vm-dctm73 installers]$ docker run –name psql -p 5432:5432 -e POSTGRES_PASSWORD=dmadmin -e POSTGRES_USER=dba -v cs_db_data:/var/lib/postgresql/data -d postgres
- Configure the user and tablespace folder:
[dmdocker@vm-dctm73 installers]$ docker exec -it psql /bin/bash
root@35d05a7640ff:/# su postgres
$ mkdir /var/lib/postgresql/data/db_d2repo_dat.dat
If you want to check if it is running, you can connect with any client such as SquirrelSQL
Content Server 7.3 + D2 files
This is similar to the “normal” content server configuration with docker:
- Load the image:
[dmdocker@vm-dctm73 ~]$ docker load -i D2cs_Corepack_Centos.tar
- Update environment variables:
dmdocker@vm-dctm73 ~]$ vi .bash_profile
#app server admin password
export APP_SERVER_ADMIN_PASSWORD=dmadmin
#This is install owner password
export INSTALL_OWNER_PASSWORD=dmadmin
#This is root user password
export ROOT_USER_PASSWORD=dmadmin
#Repository password. Required only for stateless configuration
export REPOSITORY_PASSWORD=dmadmin
#External Data base Server Admin password
export EXTERNALDB_ADMIN_PASSWORD=dmadmin
#Global Registry password
export BOF_REGISTRY_USER_PASSWORD=dmadmin
#AEK passphrase
export AEK_PASSPHRASE=dmadmin
export LOCKBOX_PASSPHRASE=Documentum.73
- Update configuration files:
[dmdocker@vm-dctm73 Scripts]$ vi statelesscs.conf
###EMC Documentum on Docker
###(c) Copyright EMC Corp., 1992 – 2016
###All rights reserved.
###Version 1.0 dated 08/Sep/2016#Documentum Content Server Image name
#Here 10.31.4.205 is Bangalore HUB.
#For PLE hub please change the ip as 10.8.46.202
#Here 7.3.0000 pointing to the latest 7.3 CS image. If we need perticular build version then just use 7.3.0000.0xxx
#Ex : 7.3.0000.0176
#Ubuntu Image: 10.31.4.205:5000/contentserver/ubuntu/stateless/cs:7.3.0000
#CentOS Image: 10.31.4.205:5000/contentserver/centos/stateless/cs:7.3.0000
#RHEL Image : 10.31.4.205:5000/contentserver/rhelora/stateless/cs:7.3.0000
IMAGE_NAME = d2cs_corepack_centos:4.7.0000.0246#documentum License
HIGH_VOLUME_SERVER_LICENSE =
TRUSTED_LICNESE=
STORAGEAWARE_LICENSE=
XMLSTORE_LICENSE=
SNAPLOCKSTORE_LICENSE=LDNAPJEWPXQ
RPS_LICENSE=
FED_RECD_SERVICE_LICENSE=
RECORD_MANAGER_LICENSE=
PRM_LICENSE=#Docbase configuration details
#Base machine IP
EXTERNAL_IP = 192.168.42.131#External Data base server IP
EXTERNALDB_IP = 192.168.42.131#External Data base Server Admin User
EXTERNALDB_ADMIN_USER = dba#External Data base Server Port number
#Default port for postgres is 5432. Oracle is 1521
DB_SERVER_PORT=5432#Docbase ID
DOCBASE_ID = 45321#Docbase name
DOCBASE_NAME = d2repo#Container host name.
CONTAINER_HOSTNAME = d2cs#Container name.
CONTAINER_NAME = d2cs#Conent Server port number to map in the base machine
CONTENT_SERVER_PORT= 50000
#Docbroker port number to map in the base machine
DOCBROKER_PORT =1689
#Method Server port number to map in the base machine
METHOD_SVR_PORT=9080#App server management port
APP_SERVER_MGMNT_PORT=9084#lockbox and aek related info
AEK_ALGORITHM = AES_256_CBC
#aek name
AEK_NAME = CSaek
#User wants to enable lock box then make it as true and provide the name and passphrase. To disable lockbox then make it as false
ENABLE_LOCKBOX = true
LOCKBOX_FILE_NAME = lockbox.lb#These are default values for 7.3. IF any thing is change like Jboss version or product version the change the values here
INSTALL_OWNER_USER=dmadmin
INSTALL_HOME=/opt
JBOSS=wildfly9.0.1
PRODUCT_MAJOR_VERSION=7.3### remote data machine and docker plugin details.
#docker plugin type local,cifs,nfs etc. By default plugin is local, means the data file system is local. If you use the file system has remote then use proper plugin type and remote host details.
DOCKER_PLUGIN_TYPE=local
#Remote data machine.
EXTERNALDATA_HOST=192.168.42.131
#Data path folder which is on remote machine.You need to create a folder and share it on remote machine
REMOTE_DATA_PATH=/opt/dctmdocker/data
#Share path which is on remote machine. You need to create a folder and share it on remote machine
REMOTE_SHARE_PATH=/opt/dctmdocker/share
#If the docker plugin type is cifs then create a dmadmin user in base machine and provide the uid here. Otherwise this filed is empty.
#While starting the nethsare plugin please use the same uid and gid as -o parameter
INSTALL_OWNER_UID=#THUMBNAIL SERVER Configuration parameters. To enable Thumnail server make it as YES.
CONFIGURE_THUMBNAIL_SERVER = NO
THUMBNAIL_SERVER_PORT = 8081
THUMBNAIL_SERVER_SSL_PORT = 8443
[dmdocker@vm-dctm73 Scripts]$ vi statelesscs_config_compose.yml
version: ‘2’
services:
dctm_cs:
image: d2cs_corepack_centos:4.7.0000.0246
environment:
– HIGH_VOLUME_SERVER_LICENSE=
– TRUSTED_LICNESE=
– STORAGEAWARE_LICENSE=
– XMLSTORE_LICENSE=
– SNAPLOCKSTORE_LICENSE=
– RPS_LICENSE=
– FED_RECD_SERVICE_LICENSE=
– RECORD_MANAGER_LICENSE=
– PRM_LICENSE=
– ROOT_USER_PASSWORD=${ROOT_USER_PASSWORD}
– INSTALL_OWNER_PASSWORD=${INSTALL_OWNER_PASSWORD}
– INSTALL_OWNER_USER=dmadmin
– REPOSITORY_PASSWORD=${REPOSITORY_PASSWORD}
– EXTERNAL_IP=192.168.42.131
– EXTERNALDB_IP=192.168.42.131
– EXTERNALDB_ADMIN_USER=dba
– EXTERNALDB_ADMIN_PASSWORD=${EXTERNALDB_ADMIN_PASSWORD}
– DB_SERVER_PORT=5432
– DOCBASE_ID=45321
– DOCBASE_NAME=centdb
– USE_EXISTING_DATABASE_ACCOUNT=false
– INDEXSPACE_NAME=dm_repo_docbase
– BOF_REGISTRY_USER_PASSWORD=${BOF_REGISTRY_USER_PASSWORD}
– AEK_ALGORITHM=AES_256_CBC
– AEK_PASSPHRASE=${AEK_PASSPHRASE}
– AEK_NAME=CSaek
– ENABLE_LOCKBOX=true
– LOCKBOX_FILE_NAME=lockbox.lb
– LOCKBOX_PASSPHRASE=${LOCKBOX_PASSPHRASE}
– USE_EXISTING_AEK_LOCKBOX=false
– CONFIGURE_THUMBNAIL_SERVER=NO
– EXTDOCBROKERPORT=1689
– CONTENTSERVER_PORT=50000
– APP_SERVER_ADMIN_PASSWORD=${APP_SERVER_ADMIN_PASSWORD}
– INSTALL_OWNER_UID=
hostname:
“cont-d2cs”
container_name:
“d2csdocker”
ports:
– “DOCBROKER_PORT:DOCBROKER_PORT”
– “DOCBROKER_SECURE_PORT:DOCBROKER_SECURE_PORT”
– “CONTENT_SERVER_PORT:CONTENT_SERVER_PORT”
– “CONTENT_SERVER_SECURE_PORT:CONTENT_SERVER_SECURE_PORT”
– “METHOD_SVR_PORT:9080”
– “METHOD_SVR_SECURE_PORT:9082”
– “METHOD_SVR_JMX_PORT:9081”
– “THUMBNAIL_SERVER_PORT:8081”
– “THUMBNAIL_SERVER_SSL_PORT:8443”
– “APP_SERVER_MGMNT_PORT:9084”
volumes:
– DocbaseName_odbc:INSTALL_HOME/dctm/odbc
– DocbaseName_data:INSTALL_HOME/dctm/data
– DocbaseName_dba:INSTALL_HOME/dctm/dba
– DocbaseName_share:INSTALL_HOME/dctm/share
– DocbaseName_dfc:INSTALL_HOME/dctm/config
– DocbaseName_xhive_storage:INSTALL_HOME/dctm/xhive_storage
– DocbaseName_XhiveConnector:INSTALL_HOME/dctm/JBOSS/server/DctmServer_MethodServer/deployments/XhiveConnector.ear
– DocbaseName_mdserver_conf:INSTALL_HOME/dctm/mdserver_conf
– DocbaseName_mdserver_log:INSTALL_HOME/dctm/JBOSS/server/DctmServer_MethodServer/log
– DocbaseName_mdserver_logs:INSTALL_HOME/dctm/JBOSS/server/DctmServer_MethodServer/logs
– DocbaseName_Thumbnail_Server_conf:INSTALL_HOME/dctm/product/PRODUCT_MAJOR_VERSION/thumbsrv/conf
– DocbaseName_Thumbnail_Server_webinf:INSTALL_HOME/dctm/product/PRODUCT_MAJOR_VERSION/thumbsrv/container/webapps/thumbsrv/WEB-INF
– DocbaseName_ServerApps:INSTALL_HOME/dctm/wildfly9.0.1/server/DctmServer_MethodServer/deployments/ServerApps.ear
– DocbaseName_acs:INSTALL_HOME/dctm/wildfly9.0.1/server/DctmServer_MethodServer/deployments/acs.ear
– DocbaseName_mdserver_modules_emc:INSTALL_HOME/dctm/wildfly9.0.1/modules/system/layers/base/emc
– DocbaseName_opt_emc_d2:/opt/EMC/D2
privileged: true
volumes:
DocbaseName_data:
driver: DOCKER_PLUGIN_TYPE
driver_opts:
share: EXTERNALDATA_HOST/REMOTE_DATA_PATH
DocbaseName_dba:
DocbaseName_share:
driver: DOCKER_PLUGIN_TYPE
driver_opts:
share: EXTERNALDATA_HOST/REMOTE_SHARE_PATH
DocbaseName_dfc:
DocbaseName_odbc:
DocbaseName_XhiveConnector:
DocbaseName_mdserver_conf:
DocbaseName_mdserver_log:
DocbaseName_mdserver_logs:
DocbaseName_Thumbnail_Server_conf:
DocbaseName_Thumbnail_Server_webinf:
DocbaseName_xhive_storage:
DocbaseName_ServerApps:
DocbaseName_acs:
DocbaseName_mdserver_modules_emc:
DocbaseName_opt_emc_d2:
- Run the creation script (the container will keep running with the repository started)
[dmdocker@vm-dctm73 Scripts]$ ./stateless_config.sh
DA
- Load the image:
[dmdocker@vm-dctm73 da]$ docker load -i Documentum_Adminstrator_Centos.tar
- Update configuration files (I’ve mapped the port used by DA to 80, so D2 can use the default 8080 and 8181, you can change this to any port you want):
[dmdocker@vm-dctm73 Scripts]$ vi statelessda_compose.yml
version: ‘2’
services:
dastateless:
image: dastatelessimage
environment:
– DOCBROKER_IP=192.168.42.131
– DOCBROKER_PORT=1689
– GLOBAL_REGISTRY_DOCBASE_NAME=d2repo
– BOF_REGISTRY_USER_PASSWORD=dmadmin
– CRYPTO_REGISTRY_DOCBASE_NAME=d2repo
– PRESETS_PREFERENCES_USER_PASSWORD=webtop
– APPSERVER_PORT=8080
– DFC_SESSION_SECURE_CONNECT_DEFAULT=try_native_first
container_name:
“da”
ports:
– “80:8080”
volumes:
– dalogs:/opt/tomcat/logs
– dacustom:/opt/tomcat/webapps/da/custom
privileged: true
volumes:
dalogs:
dacustom:
[dmdocker@vm-dctm73 Scripts]$ vi statelessda.conf
DOCBROKER_IP = 192.168.42.131
DOCBROKER_PORT = 1689
GLOBAL_REGISTRY_DOCBASE_NAME = d2repo
BOF_REGISTRY_USER_PASSWORD = dmadmin
CRYPTO_REGISTRY_DOCBASE_NAME = d2repo
PRESETS_PREFERENCES_USER_PASSWORD = webtop
IMAGE_NAME = da_centos:7.3.0000.0074
CONTAINER_HOSTNAME = dastatelessimage
APPSERVER_PORT = 8080
DFC_SESSION_SECURE_CONNECT_DEFAULT = try_native_first
- Run the configuration script:
[dmdocker@vm-dctm73 Scripts]$ ./statelessda_config.sh
And you should be able to access DA in http://<your_vm_ip/da
D2 Config
- Update provided dfc.properties in Config folder:
dfc.data.dir=/home/root/dctm
dfc.tokenstorage.dir=/home/root/dctm/apptoken
dfc.tokenstorage.enable=false
dfc.docbroker.host[0]=cont-d2cs
dfc.docbroker.port[0]=1489
dfc.docbroker.host[1]=cont-d2cs
dfc.docbroker.port[1]=1689
dfc.crypto.repository=d2repo
dfc.session.secure_connect_default=try_native_first
dfc.globalregistry.repository=d2repo
dfc.globalregistry.username=dm_bof_registry
dfc.globalregistry.password=AAAAEKirNMA6wt15JG4eDkp2cZ39euSH+HZGKgH+x3j7H4dK
- Load the image:
[dmdocker@vm-dctm73 d2-config]$ docker load -i D2config_Corepack_Ubuntu.tar
- Create a volume to store the log files:
[dmdocker@vm-dctm73 d2-config]$ docker volume create –name=d2configlogs
- Start a container with the following command:
[dmdocker@vm-dctm73 Configfiles]$ docker run -h d2config –name d2config -d -v /opt/dctmdocker/installers/d2-config/Configfiles:/usr/local/tomcat/CustomConf -v d2configlogs:/usr/local/tomcat/webapps/D2-Config/logs -ti –add-host cont-d2cs:192.168.42.131 -p 8181:8080 d2config_corepack_ubuntu:4.7.0000.0246
Now we need to add the D2 Config instance to the privileged clients list, so if you don’t have Java in the machine, install it:
[dmdocker@vm-dctm73 Configfiles]$ sudo yum install java-1.8.0-openjdk
- Get the keystore info:
[dmdocker@vm-dctm73 Configfiles]$ keytool -list -keystore dfc.keystore -storepass dfc -v
The line you want is the one that starts with “Owner”:
Owner: CN=dfc_K26safmZbYRvAPA6Q2XkHBGvOZQa, O=EMC, OU=Documentum
Now, go to DA, Client Rights Management, Privileged clients, Manage Clients, add the DFC instance to the privileged client list and then approve the client.
Now you should be able to access D2-Config in http://<your_vm_ip>:8181/D2-Config
D2 Client
This exactly the same procedure described for D2 Config:
- Update provided dfc.properties in Config folder
dfc.data.dir=/home/root/dctm
dfc.tokenstorage.dir=/home/root/dctm/apptoken
dfc.tokenstorage.enable=false
dfc.docbroker.host[0]=cont-d2cs
dfc.docbroker.port[0]=1489
dfc.docbroker.host[1]=cont-d2cs
dfc.docbroker.port[1]=1689
dfc.crypto.repository=d2repo
dfc.session.secure_connect_default=try_native_first
dfc.globalregistry.repository=d2repo
dfc.globalregistry.username=dm_bof_registry
dfc.globalregistry.password=AAAAEKirNMA6wt15JG4eDkp2cZ39euSH+HZGKgH+x3j7H4dK
- Load the image:
[dmdocker@vm-dctm73 d2-client]$ docker load -i D2client_Corepack_Ubuntu.tar
- Create a volume to store the log files:
[dmdocker@vm-dctm73 d2-client]$ docker volume create –name=d2clientlogs
- Start a container with the following command:
[dmdocker@vm-dctm73 Configfiles]$ docker run -h d2client –name d2client -d -v /opt/dctmdocker/installers/d2-client/Configfiles:/usr/local/tomcat/CustomConf -v d2clientlogs:/usr/local/tomcat/webapps/D2/logs -ti –add-host cont-d2cs:192.168.42.131 -p 8080:8080 d2client_corepack_ubuntu:4.7.0000.0246
- Get the keystore info:
[dmdocker@vm-dctm73 Configfiles]$ keytool -list -keystore dfc.keystore -storepass dfc -v
Again, get the owner info:
Owner: CN=dfc_nwacq6MGbSWEGIYstBDnukYIYWUa, O=EMC, OU=Documentum
Now, go to DA, Client Rights Management, Privileged clients, Manage Clients, add the DFC instance to the privileged client list and then approve the client.
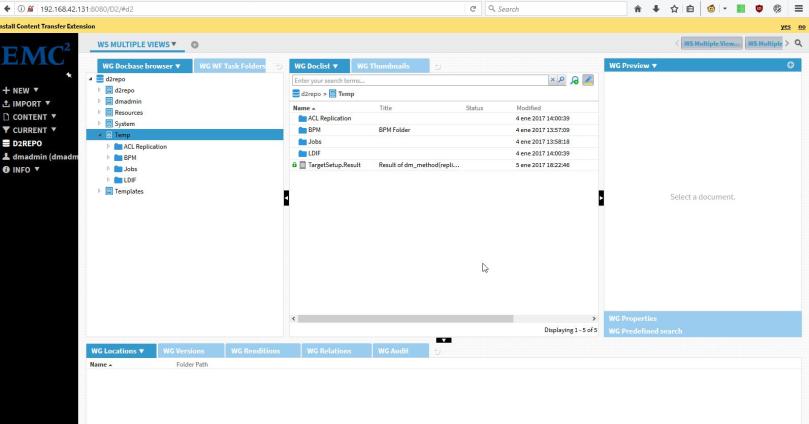
Now you should be able to access D2 in http://<your_vm_ip>:8080/D2, and a full docker Documentum environtment.
DCTM 7.3 PostgreSQL with Docker install guide
This is a step-by-step guide to install Documentum 7.3 with Docker in a Linux host with PostgreSQL 9.4.
Environment
Host:
Windows 10 x64 8GB RAM
VMware Workstation Player 12
Guest:
CentOS 7 x64 25GB HD 4GB RAM 2 cores
PostgreSQL 9.4
Docker 1.12
Documentum 7.3 PostgreSQL docker tar file
VM Creation
Mount the CentOS 7 DVD image, boot the machine and follow the steps. You can choose to let EasyInstall do the work for you. I used minimal package install to save resources, named the machine vm-dctm73, configure the network and set the root password.
OS Configuration
Follow the instructions posted in the DCTM 7.3 PostgreSQL Dev. Edition post for configuring the OS and PostgreSQL 9.4 (no need to configure the ODBC, just install PostgreSQL and phpPgAdmin). This time I’ve used “dmdocker” instead of “dmadmin”.
Extra steps to perform:
- Create the following folder structure:
[dmdocker@vm-dctm73 ~]$ sudo mkdir /opt/dctmdocker
[dmdocker@vm-dctm73 ~]$ sudo chown dmdocker.dmdocker /opt/dctmdocker
[dmdocker@vm-dctm73 ~]$ mkdir /opt/dctmdocker/installers
[dmdocker@vm-dctm73 ~]$ mkdir /opt/dctmdocker/data
[dmdocker@vm-dctm73 ~]$ mkdir /opt/dctmdocker/share
- Update the distribution (you need at least kernel 3.10.0.229, you can check the version by running “uname -r”)
[dmdocker@vm-dctm73 ~]$ sudo yum update
- Enable connections from 172.18.x.x to the database (IP used by docker containers, you can set this up after you run a docker contanier and know which IP range will be using, or you can enable access for anyone):
[dmadmin@vm-dctm73 opt]$ sudo vi /var/lib/pgsql/9.4/data/pg_hba.conf
host all all 172.18.0.1/24 md5
[dmadmin@vm-dctm73 opt]$ sudo systemctl restart postgresql-9.4
And don’t forget to copy the Documentum 7.3 docker tar file to /opt/dctmdocker/installers
Docker Configuration
- Install docker:
[dmdocker@vm-dctm73 ~]$ curl -fsSL https://get.docker.com/ | sh
- I had to remove docker selinux due to incompatibily problems so:
[dmdocker@vm-dctm73 ~]$ yum remove docker-engine-selinux
- Add user to docker group to avoid using sudo every time we use the docker command:
[dmdocker@vm-dctm73 ~]$ sudo usermod -aG docker dmdocker
- Enable the service and start docker daemon:
[dmdocker@vm-dctm73 ~]$ sudo systemctl enable docker.service
[dmdocker@vm-dctm73 ~]$ sudo systemctl start docker
- Check docker is correctly installed by running the hello-world container:
[dmdocker@vm-dctm73 ~]$ docker run –rm hello-world
- Install docker-compose (using root):
[root@vm-dctm73 ~]# curl -L https://github.com/docker/compose/releases/download/1.9.0/docker-compose-`uname -s`-`uname -m` > /usr/local/bin/docker-compose
[root@vm-dctm73 ~]# chmod +x /usr/local/bin/docker-compose
Content Server Configuration
- Import the docker image:
[dmdocker@vm-dctm73 installers]$ docker load -i Contentserver_Centos.tar
- Check the image is listed now in the local docker repository:
[dmdocker@vm-dctm73 ~]$ docker images
REPOSITORY TAG IMAGE ID CREATED SIZE
contentserver_centos 7.3.0000.0214 5a22b41bc55f 10 seconds ago 2.252 GB
hello-world latest c54a2cc56cbb 5 months ago 1.848 kB
- Create the tablespace file:
[dmdocker@vm-dctm73 cs]$ su –
[root@vm-dctm73 ~]# su – postgres
-bash-4.2$ mkdir /var/lib/pgsql/9.4/data/db_centdb_dat.dat
- Configure the required environment variables (remember that lockbox passphrase requires at least one uppercase letter, one symbol and one number):
[dmdocker@vm-dctm73 ~]$ vi .bash_profile
#app server admin password
export APP_SERVER_ADMIN_PASSWORD=dmadmin
#This is install owner password
export INSTALL_OWNER_PASSWORD=dmadmin
#This is root user password
export ROOT_USER_PASSWORD=dmadmin
#Repository password. Required only for stateless configuration
export REPOSITORY_PASSWORD=dmadmin
#External Data base Server Admin password
export EXTERNALDB_ADMIN_PASSWORD=dmadmin
#Global Registry password
export BOF_REGISTRY_USER_PASSWORD=dmadmin
#AEK passphrase
export AEK_PASSPHRASE=dmadmin
export LOCKBOX_PASSPHRASE=Documentum.73
- Configure statelesscs.conf. Few notes:
- Change IMAGE_NAME to the name of your image in your docker repository.
- IP here is the IP of the virtual machine (CentOS) because our database is installed in the host.
- ENABLE_LOCKBOX=false doesn’t work. It didn’t work for me when I did the (Unofficial) D7.2 Developer Docker edition (I) and it still doesn’t work. It’s probably a misconfiguration of the installer though.
[dmdocker@vm-dctm73 ~]$ vi /opt/dctmdocker/installers/Scripts/statelesscs.conf
###EMC Documentum on Docker
###(c) Copyright EMC Corp., 1992 – 2016
###All rights reserved.
###Version 1.0 dated 08/Sep/2016#Documentum Content Server Image name
#Here 10.31.4.205 is Bangalore HUB.
#For PLE hub please change the ip as 10.8.46.202
#Here 7.3.0000 pointing to the latest 7.3 CS image. If we need perticular build version then just use 7.3.0000.0xxx
#Ex : 7.3.0000.0176
#Ubuntu Image: 10.31.4.205:5000/contentserver/ubuntu/stateless/cs:7.3.0000
#CentOS Image: 10.31.4.205:5000/contentserver/centos/stateless/cs:7.3.0000
#RHEL Image : 10.31.4.205:5000/contentserver/rhelora/stateless/cs:7.3.0000
IMAGE_NAME = contentserver_centos:7.3.0000.0214#documentum License
HIGH_VOLUME_SERVER_LICENSE =
TRUSTED_LICNESE=
STORAGEAWARE_LICENSE=
XMLSTORE_LICENSE=
SNAPLOCKSTORE_LICENSE=LDNAPJEWPXQ
RPS_LICENSE=
FED_RECD_SERVICE_LICENSE=
RECORD_MANAGER_LICENSE=
PRM_LICENSE=#Docbase configuration details
#Base machine IP
EXTERNAL_IP = 192.168.42.131#External Data base server IP
EXTERNALDB_IP = 192.168.42.131#External Data base Server Admin User
EXTERNALDB_ADMIN_USER = postgres#External Data base Server Port number
#Default port for postgres is 5432. Oracle is 1521
DB_SERVER_PORT=5432#Docbase ID
DOCBASE_ID = 45321#Docbase name
DOCBASE_NAME = centdb#Container host name.
CONTAINER_HOSTNAME = centstateless#Container name.
CONTAINER_NAME = centstateless#Conent Server port number to map in the base machine
CONTENT_SERVER_PORT= 50000
#Docbroker port number to map in the base machine
DOCBROKER_PORT =1689
#Method Server port number to map in the base machine
METHOD_SVR_PORT=9080#App server management port
APP_SERVER_MGMNT_PORT=9084#lockbox and aek related info
AEK_ALGORITHM = AES_256_CBC
#aek name
AEK_NAME = CSaek
#User wants to enable lock box then make it as true and provide the name and passphrase. To disable lockbox then make it as false
ENABLE_LOCKBOX = true
LOCKBOX_FILE_NAME = lockbox.lb#These are default values for 7.3. IF any thing is change like Jboss version or product version the change the values here
INSTALL_OWNER_USER=dmadmin
INSTALL_HOME=/opt
JBOSS=wildfly9.0.1
PRODUCT_MAJOR_VERSION=7.3### remote data machine and docker plugin details.
#docker plugin type local,cifs,nfs etc. By default plugin is local, means the data file system is local. If you use the file system has remote then use proper plugin type and remote host details.
DOCKER_PLUGIN_TYPE=local
#Remote data machine.
EXTERNALDATA_HOST=192.168.42.131
#Data path folder which is on remote machine.You need to create a folder and share it on remote machine
REMOTE_DATA_PATH=/opt/dctmdocker/data
#Share path which is on remote machine. You need to create a folder and share it on remote machine
REMOTE_SHARE_PATH=/opt/dctmdocker/share
#If the docker plugin type is cifs then create a dmadmin user in base machine and provide the uid here. Otherwise this filed is empty.
#While starting the nethsare plugin please use the same uid and gid as -o parameter
INSTALL_OWNER_UID=#THUMBNAIL SERVER Configuration parameters. To enable Thumnail server make it as YES.
CONFIGURE_THUMBNAIL_SERVER = NO
THUMBNAIL_SERVER_PORT = 8081
THUMBNAIL_SERVER_SSL_PORT = 8443
- Configure statelesscs_config_compose.yml:
[dmdocker@vm-dctm73 ~]$ vi /opt/dctmdocker/installers/Scripts/statelesscs_config_compose.yml
version: ‘2’
services:
dctm_cs:
image: contentserver_centos:7.3.0000.0214
environment:
– HIGH_VOLUME_SERVER_LICENSE=
– TRUSTED_LICNESE=
– STORAGEAWARE_LICENSE=
– XMLSTORE_LICENSE=
– SNAPLOCKSTORE_LICENSE=
– RPS_LICENSE=
– FED_RECD_SERVICE_LICENSE=
– RECORD_MANAGER_LICENSE=
– PRM_LICENSE=
– ROOT_USER_PASSWORD=${ROOT_USER_PASSWORD}
– INSTALL_OWNER_PASSWORD=${INSTALL_OWNER_PASSWORD}
– INSTALL_OWNER_USER=dmadmin
– REPOSITORY_PASSWORD=${REPOSITORY_PASSWORD}
– EXTERNAL_IP=192.168.42.131
– EXTERNALDB_IP=192.168.42.131
– EXTERNALDB_ADMIN_USER=postgres
– EXTERNALDB_ADMIN_PASSWORD=${EXTERNALDB_ADMIN_PASSWORD}
– DB_SERVER_PORT=5432
– DOCBASE_ID=45321
– DOCBASE_NAME=centdb
– USE_EXISTING_DATABASE_ACCOUNT=false
– INDEXSPACE_NAME=dm_repo_docbase
– BOF_REGISTRY_USER_PASSWORD=${BOF_REGISTRY_USER_PASSWORD}
– AEK_ALGORITHM=AES_256_CBC
– AEK_PASSPHRASE=${AEK_PASSPHRASE}
– AEK_NAME=CSaek
– ENABLE_LOCKBOX=true
– LOCKBOX_FILE_NAME=lockbox.lb
– LOCKBOX_PASSPHRASE=${LOCKBOX_PASSPHRASE}
– USE_EXISTING_AEK_LOCKBOX=false
– CONFIGURE_THUMBNAIL_SERVER=NO
– EXTDOCBROKERPORT=1689
– CONTENTSERVER_PORT=50000
– APP_SERVER_ADMIN_PASSWORD=${APP_SERVER_ADMIN_PASSWORD}
– INSTALL_OWNER_UID=1001
hostname:
“cont-dctm73”
container_name:
“dctm73docker”
ports:
– “DOCBROKER_PORT:DOCBROKER_PORT”
– “DOCBROKER_SECURE_PORT:DOCBROKER_SECURE_PORT”
– “CONTENT_SERVER_PORT:CONTENT_SERVER_PORT”
– “CONTENT_SERVER_SECURE_PORT:CONTENT_SERVER_SECURE_PORT”
– “METHOD_SVR_PORT:9080”
– “METHOD_SVR_SECURE_PORT:9082”
– “METHOD_SVR_JMX_PORT:9081”
– “THUMBNAIL_SERVER_PORT:8081”
– “THUMBNAIL_SERVER_SSL_PORT:8443”
– “APP_SERVER_MGMNT_PORT:9084”
volumes:
– DocbaseName_odbc:INSTALL_HOME/dctm/odbc
– DocbaseName_data:INSTALL_HOME/dctm/data
– DocbaseName_dba:INSTALL_HOME/dctm/dba
– DocbaseName_share:INSTALL_HOME/dctm/share
– DocbaseName_dfc:INSTALL_HOME/dctm/config
– DocbaseName_xhive_storage:INSTALL_HOME/dctm/xhive_storage
– DocbaseName_XhiveConnector:INSTALL_HOME/dctm/JBOSS/server/DctmServer_MethodServer/deployments/XhiveConnector.ear
– DocbaseName_mdserver_conf:INSTALL_HOME/dctm/mdserver_conf
– DocbaseName_mdserver_log:INSTALL_HOME/dctm/JBOSS/server/DctmServer_MethodServer/log
– DocbaseName_mdserver_logs:INSTALL_HOME/dctm/JBOSS/server/DctmServer_MethodServer/logs
– DocbaseName_Thumbnail_Server_conf:INSTALL_HOME/dctm/product/PRODUCT_MAJOR_VERSION/thumbsrv/conf
– DocbaseName_Thumbnail_Server_webinf:INSTALL_HOME/dctm/product/PRODUCT_MAJOR_VERSION/thumbsrv/container/webapps/thumbsrv/WEB-INF
privileged: true
volumes:
DocbaseName_data:
driver: DOCKER_PLUGIN_TYPE
driver_opts:
share: EXTERNALDATA_HOST/REMOTE_DATA_PATH
DocbaseName_dba:
DocbaseName_share:
driver: DOCKER_PLUGIN_TYPE
driver_opts:
share: EXTERNALDATA_HOST/REMOTE_SHARE_PATH
DocbaseName_dfc:
DocbaseName_odbc:
DocbaseName_XhiveConnector:
DocbaseName_mdserver_conf:
DocbaseName_mdserver_log:
DocbaseName_mdserver_logs:
DocbaseName_Thumbnail_Server_conf:
DocbaseName_Thumbnail_Server_webinf:
DocbaseName_xhive_storage:
- Run the configuration script:
[dmdocker@vm-dctm73 ~]$ cd /opt/dctmdocker/installers/Scripts/
[dmdocker@vm-dctm73 Scripts]$ chmod 755 stateless_config.sh
[dmdocker@vm-dctm73 Scripts]$ ./stateless_config.sh
- Now you can get a terminal from the container:
[dmdocker@vm-dctm73 Scripts]$ docker exec -i -t dctm73docker /bin/bash
And check the progress of the installation in /opt/dctm_docker/logs/centstateless/cont-dctm73.log
If anything fails and you need to run the script again, make sure the created volumes (docker volume ls) are removed before running again the script or the installer will fail.
DCTM 7.3 PostgreSQL Dev. Edition
This is a step-by-step guide to install Documentum 7.3 in a Linux environment with PostgreSQL 9.4.
I didn’t bother with screenshots, but installation should be easy 😀
Environment
Host:
Windows 10 x64 8GB RAM
VMware Workstation Player 12
Guest:
CentOS 7 x64 25GB HD 4GB RAM 2 cores
PostgreSQL 9.4
Documentum 7.3
VM Creation
Mount the CentOS 7 DVD image, boot the machine and follow the steps. You can choose to let EasyInstall do the work for you. I used minimal package install to save resources, named the machine vm-dctm73, configure the network and set the root password.
OS Configuration
- Install required packages:
[dmadmin@vm-dctm73 ~]$ sudo yum install net-tools bash-completion kernel-devel rng-tools.x86_64
[dmadmin@vm-dctm73 opt]$ sudo yum install policycoreutils policycoreutils-python selinux-policy selinux-policy-targeted libselinux-utils setroubleshoot-server setools setools-console mcstrans
[dmadmin@vm-dctm73 ~]$ sudo yum group install X\ Window\ System “Development Tools”
If you want to install vmware tools do it now. You can check the steps in the post for the D7.2 developer edition
- Stop and disable the firewalld service:
[dmadmin@vm-dctm73 ~]$ sudo systemctl disable firewalld
[dmadmin@vm-dctm73 ~]$ sudo systemctl stop firewalld
- Configure the entropy and allow http connections through selinux:
[dmadmin@vm-dctm73 opt]$ sudo /sbin/rngd -b -r /dev/urandom -p /dev/random
[dmadmin@vm-dctm73 opt]$ sudo setsebool -P httpd_can_network_connect_db 1
- Create folder structure for Documentum:
[dmadmin@vm-dctm73 opt]$ sudo mkdir documentum
[dmadmin@vm-dctm73 opt]$ sudo chown dmadmin.dmadmin documentum
[dmadmin@vm-dctm73 opt]$ mkdir documentum/product
[dmadmin@vm-dctm73 opt]$ mkdir documentum/product/7.3
[dmadmin@vm-dctm73 opt]$ mkdir documentum/installers
[dmadmin@vm-dctm73 opt]$ mkdir documentum/installers/cs
PostgreSQL Configuration
- Install required packages:
[dmadmin@vm-dctm73 opt]$ sudo yum install https://download.postgresql.org/pub/repos/yum/9.4/redhat/rhel-7-x86_64/pgdg-centos94-9.4-3.noarch.rpm
[dmadmin@vm-dctm73 opt]$ sudo yum install postgresql94-server postgresql94-contrib
- Init the DB:
[dmadmin@vm-dctm73 opt]$ sudo /usr/pgsql-9.4/bin/postgresql94-setup initdb
- Enable and start the PostgreSQL service:
[dmadmin@vm-dctm73 opt]$ sudo systemctl enable postgresql-9.4
Created symlink from /etc/systemd/system/multi-user.target.wants/postgresql-9.4.service to /usr/lib/systemd/system/postgresql-9.4.service.
[dmadmin@vm-dctm73 opt]$ sudo systemctl start postgresql-9.4
- Configure the postgres user:
[dmadmin@vm-dctm73 opt]$ su – root
[root@vm-dctm73 ~]# su – postgres-bash-4.2$ psql
postgres=# \password postgres
postgres=# \q
-bash-4.2$ exit
logout
- Configure PostgreSQL:
[dmadmin@vm-dctm73 opt]$ sudo vi /var/lib/pgsql/9.4/data/postgresql.conf
listen_addresses = ‘*’
port = 5432[dmadmin@vm-dctm73 opt]$ sudo vi /var/lib/pgsql/9.4/data/pg_hba.conf
host all all 127.0.0.1/32 md5
host all all vm-dctm73 md5
- Restart PostgreSQL service to apply the changes:
[dmadmin@vm-dctm73 opt]$ sudo systemctl restart postgresql-9.4
phpPgAdmin Configuration
- Install required packages:
[dmadmin@vm-dctm73 opt]$ sudo yum install phpPgAdmin httpd
- Configure phpPgAdmin:
[dmadmin@vm-dctm73 opt]$ sudo vi /etc/httpd/conf.d/phpPgAdmin.conf
# Apache 2.4
Require all granted
#Require host example.com# Apache 2.2
Order deny,allow
Allow from all
# Allow from 127.0.0.1
# Allow from ::1
# Allow from .example.com[dmadmin@vm-dctm73 opt]$ sudo vi /etc/phpPgAdmin/config.inc.php
$conf[‘servers’][0][‘host’] = ‘192.168.42.130’;
$conf[‘extra_login_security’] = false;
$conf[‘owned_only’] = true;
- Restart httpd service to apply the changes:
[dmadmin@vm-dctm73 opt]$ sudo systemctl restart httpd
Now you should be able to login to the console from http://vm-dctm73/phpPgAdmin/
ODBC Configuration
- Install required packages:
[dmadmin@vm-dctm73 opt]$ sudo yum install postgresql94-odbc-debuginfo.x86_64 postgresql94-odbc.x86_64 unixODBC.x86_64
- Configure .ini files:
[dmadmin@vm-dctm73 opt]$ sudo vi /etc/odbcinst.ini
[PostgreSQL]
Description = ODBC for PostgreSQL
#Driver = /usr/lib/psqlodbcw.so
#Setup = /usr/lib/libodbcpsqlS.so
#Driver64 = /usr/lib64/psqlodbcw.so
#Setup64 = /usr/lib64/libodbcpsqlS.so
Driver = /usr/pgsql-9.4/lib/psqlodbcw.so
Driver64 = /usr/pgsql-9.4/lib/psqlodbcw.so
Setup64 = /usr/lib64/libodbcpsqlS.so
FileUsage = 1[dmadmin@vm-dctm73 opt]$ sudo vi /etc/odbc.ini
[MyPostgres]
Description=PostgreSQL
Driver=PostgreSQL
Database=postgres
Servername=vm-dctm73
UserName=postgres
Password=dmadmin
Port=5432
Protocol=7.4
ReadOnly=No
RowVersioning=No
ShowSystemTables=No
ShowOidColumn=No
FakeOidIndex=No
UpdateableCursors=Yes
DEBUG=Yes
- Test the connection:
[dmadmin@vm-dctm73 opt]$ isql -v MyPostgres
+—————————————+
| Connected! |
| |
| sql-statement |
| help [tablename] |
| quit |
| |
+—————————————+
SQL> quit
Content Server install
- Set up environment variables:
[dmadmin@vm-dctm73 opt]$ cd $HOME
[dmadmin@vm-dctm73 ~]$ vi .bash_profile
DOCUMENTUM=/opt/documentum
export DOCUMENTUMDM_HOME=$DOCUMENTUM/product/7.3
export DM_HOMEPOSTGRESQL_HOME=/usr/pgsql-9.4
export POSTGRESQL_HOMEPATH=$PATH:$DM_HOME/bin:$POSTGRESQL_HOME/bin:$HOME/.local/bin:$HOME/bin
export PATHLC_ALL=C
export LC_ALLLD_LIBRARY_PATH=$POSTGRESQL_HOME/lib:$DM_HOME/bin:/opt/documentum/java64/JAVA_LINK/jre/lib/amd64/server:$LD_LIBRARY_PATH
export LD_LIBRARY_PATH
- Reserve ports for services:
[dmadmin@vm-dctm73 ~]$ sudo vi /etc/services
dctm73 49001/tcp # dctm73 native
dctm73_s 49002/tcp # dctm73 secure
- Create symbolic link for later (configuration program):
[dmadmin@vm-dctm73 ~]$ sudo ln -s /usr/lib64/libsasl2.so.3 /usr/lib64/libsasl2.so.2
- Run the installer:
[dmadmin@vm-dctm73 ~]$ cd /opt/documentum/installers/cs/
[dmadmin@vm-dctm73 cs]$ chmod 775 serverSetup.bin
[dmadmin@vm-dctm73 cs]$ ./serverSetup.bin
Just follow the installer and CS files will be installed.
Repository configuration
- Create the tablespace file for the repository (dctm73):
[dmadmin@vm-dctm73 cs]$ su – root
[root@vm-dctm73 ~]# su – postgres
-bash-4.2$ mkdir /var/lib/pgsql/9.4/data/db_dctm73_dat.dat
- Test database connection with dmdbtest:
[dmadmin@vm-dctm73 cs]$ dmdbtest -Dpostgres -SMyPostgres -Upostgres -Pdmadmin
Failed to make a database connection using the following data:
Database Server: MyPostgres
Database Name : postgres
User Name : postgres
User Password : Check either the -P flag on command line or
the password file specified in your server.ini
Error from database system is: STATE=01000, CODE=0, MSG=[unixODBC][Driver Manager]Can’t open lib ‘/usr/pgsql-9.4/lib/psqlodbcw.so’ : file not found
ERROR(-1) (system code: -1)
What? Well, after some digging, the easiest solution is to take that library from the docker image. If you have no idea what Docker is, or you think it is a brand of jeans, just download the docker tar from EMC and open Contentserver_Centos\eddd155b2fecc3cc682aeec8d9c6e966259e3df22fe15d6fd6e34dc9d41fe0d4\layer.tar. You’ll find there the files you need.
- So, copy the files to the /usr/pgsql-9.4/lib directory:
[dmadmin@vm-dctm73 installers]$ chmod 755 *.so
[dmadmin@vm-dctm73 installers]$ sudo cp *.so /usr/pgsql-9.4/lib/
- And run the test again:
[dmadmin@vm-dctm73 installers]$ dmdbtest -Dpostgres -SMyPostgres -Upostgres -Pdmadmin
Database successfully opened.
Test table successfully created.
Test view successfully created.
Test index successfully created.
Insert into table successfully done.
Index successfully dropped.
View successfully dropped.
Database case sensitivity test successfully past.
Table successfully dropped.
- Now run the server configuration program:
[dmadmin@vm-dctm73 installers]$ ../product/7.3/install/dm_launch_server_config_program.sh
Configure the docbroker, the repository, and when the installation finishes, check the installation guide (Documentum Platform and Platform Extensions 7.3 Installation Guide) and go through the section “Tuning PostgreSQL database”
What I expect for Documentum from ECD/OpenText
What I think OpenText should keep:
- Support Community
- ContentHub
- EMC Support (at least the search engine with the knowledge base)
- Download Center (After so many changes, I really don’t want to change again :P)
- EMC GitHub
- Webtop (It’s the only client that works OOTB)
What I think OpenText should change:
- Sales policy (Stop pushing products that customers don’t need, and yes, that means D2 and xCP for customers that simply want a “library”)
- Sort libraries/dependencies in the Documentum stack (if 7.x is released, make it that every product has the same version of every library). Rebrand products accordingly (yeah, Webtop 7.x if it is using DFC 7.x)
- Detailed changelog of the products (don’t force us to go through every single customization to check if some component we’re extending has changed and broke the customizations)
- Kill lockbox with fire (or at least, make it optional for both CS and D2). Nobody understands it, nobody knows how to set it up, so it is more a pain in the ass than a security feature
- Oh, and remove D2 dependency on JMS
I’ve lost any hope to see dmbasic gone for good, or JBOSS replaced with something “lighter”, that’s why those didn’t make it into the list (as probably many others, that I don’t remember now)
(And yes, I’m not a huge fan of D2 :P)
Documentum 7.3 available to download
Documentum 7.3 (and the docker images) are available to download from support.emc.com