This is a step-by-step guide to install Intelligent Viewing 25.4 in WSL2 using the Rocky Linux 9 image with PostgreSQL 17.
As a requisite, you’ll need to have a valid license for it, otherwise services will fail to properly start.
First step is to prepare the database, as I’m using the same VM used for Documentum 25.4 PostgreSQL 17 on Rocky Linux 9.6 (WSL2) Install Guide, you can create an additional “iv” user/database following the steps detailed on OTDS 24.4 on Rocky Linux 9.5 (WSL2) Install Guide. Just be aware that you need to create the “pgcrypto” extension.
Once the database is installed, we can start installing the first required applications and required packages such as nodeJS, npm, etc (Java is already present from Documentum Content Server installation)
[root@localhost ~]# yum -y install nodejs npm mesa-libGL mesa-libGLU Xvfb logrotate
[root@localhost ~]# node -v
[root@localhost ~]# npm -v
Once we’ve checked node and npm are installed and working, we have to install RabbitMQ, and for that we need to install the erlang dependency:
[root@localhost ~]# vi /etc/yum.repos.d/rabbitmq.repo
# In /etc/yum.repos.d/rabbitmq.repo

##
## Zero dependency Erlang RPM
##

[modern-erlang]
name=modern-erlang-el9
# Use a set of mirrors maintained by the RabbitMQ core team.
# The mirrors have significantly higher bandwidth quotas.
baseurl=https://yum1.rabbitmq.com/erlang/el/9/$basearch
        https://yum2.rabbitmq.com/erlang/el/9/$basearch
repo_gpgcheck=1
enabled=1
gpgkey=https://github.com/rabbitmq/signing-keys/releases/download/3.0/cloudsmith.rabbitmq-erlang.E495BB49CC4BBE5B.key
gpgcheck=1
sslverify=1
sslcacert=/etc/pki/tls/certs/ca-bundle.crt
metadata_expire=300
pkg_gpgcheck=1
autorefresh=1
type=rpm-md

[modern-erlang-noarch]
name=modern-erlang-el9-noarch
# Use a set of mirrors maintained by the RabbitMQ core team.
# The mirrors have significantly higher bandwidth quotas.
baseurl=https://yum1.rabbitmq.com/erlang/el/9/noarch
        https://yum2.rabbitmq.com/erlang/el/9/noarch
repo_gpgcheck=1
enabled=1
gpgkey=https://github.com/rabbitmq/signing-keys/releases/download/3.0/cloudsmith.rabbitmq-erlang.E495BB49CC4BBE5B.key
       https://github.com/rabbitmq/signing-keys/releases/download/3.0/rabbitmq-release-signing-key.asc
gpgcheck=1
sslverify=1
sslcacert=/etc/pki/tls/certs/ca-bundle.crt
metadata_expire=300
pkg_gpgcheck=1
autorefresh=1
type=rpm-md


##
## RabbitMQ Server
##

[rabbitmq-el9]
name=rabbitmq-el9
baseurl=https://yum2.rabbitmq.com/rabbitmq/el/9/$basearch
        https://yum1.rabbitmq.com/rabbitmq/el/9/$basearch
repo_gpgcheck=1
enabled=1
# Cloudsmith's repository key and RabbitMQ package signing key
gpgkey=https://github.com/rabbitmq/signing-keys/releases/download/3.0/cloudsmith.rabbitmq-server.9F4587F226208342.key
       https://github.com/rabbitmq/signing-keys/releases/download/3.0/rabbitmq-release-signing-key.asc
gpgcheck=1
sslverify=1
sslcacert=/etc/pki/tls/certs/ca-bundle.crt
metadata_expire=300
pkg_gpgcheck=1
autorefresh=1
type=rpm-md

[rabbitmq-el9-noarch]
name=rabbitmq-el9-noarch
baseurl=https://yum2.rabbitmq.com/rabbitmq/el/9/noarch
        https://yum1.rabbitmq.com/rabbitmq/el/9/noarch
repo_gpgcheck=1
enabled=1
# Cloudsmith's repository key and RabbitMQ package signing key
gpgkey=https://github.com/rabbitmq/signing-keys/releases/download/3.0/cloudsmith.rabbitmq-server.9F4587F226208342.key
       https://github.com/rabbitmq/signing-keys/releases/download/3.0/rabbitmq-release-signing-key.asc
gpgcheck=1
sslverify=1
sslcacert=/etc/pki/tls/certs/ca-bundle.crt
metadata_expire=300
pkg_gpgcheck=1
autorefresh=1
type=rpm-md
Now we can install the dependency:
[root@localhost ~]# dnf update -y
[root@localhost ~]# dnf install erlang -y
And install RabbitMQ:
[root@localhost ~]# wget https://github.com/rabbitmq/rabbitmq-server/releases/download/v4.2.2/rabbitmq-server-4.2.2-1.el8.noarch.rpm
[root@localhost ~]# rpm --import https://www.rabbitmq.com/rabbitmq-release-signing-key.asc
[root@localhost ~]# dnf install https://github.com/rabbitmq/erlang-rpm/releases/download/3.0/rabbitmq-erlang-26.2-1.el9.noarch.rpm -y
Now configure RabbitMQ:
[root@localhost ~]# rabbitmq-plugins enable rabbitmq_management
Enabling plugins on node rabbit@localhost:
rabbitmq_management
The following plugins have been configured:
rabbitmq_management
rabbitmq_management_agent
rabbitmq_web_dispatch
Applying plugin configuration to rabbit@localhost…
The following plugins have been enabled:
rabbitmq_management
rabbitmq_management_agent
rabbitmq_web_dispatch

started 3 plugins.

[root@localhost ~]# rabbitmqctl add_user mqadmin admin
[root@localhost ~]# rabbitmqctl set_user_tags mqadmin administrator
[root@localhost ~]# rabbitmqctl set_permissions -p / mqadmin ".*" ".*" ".*"

[root@localhost ~]# systemctl enable rabbitmq-server
Created symlink /etc/systemd/system/multi-user.target.wants/rabbitmq-server.service → /usr/lib/systemd/system/rabbitmq-server.service.
[root@localhost ~]# systemctl start rabbitmq-server
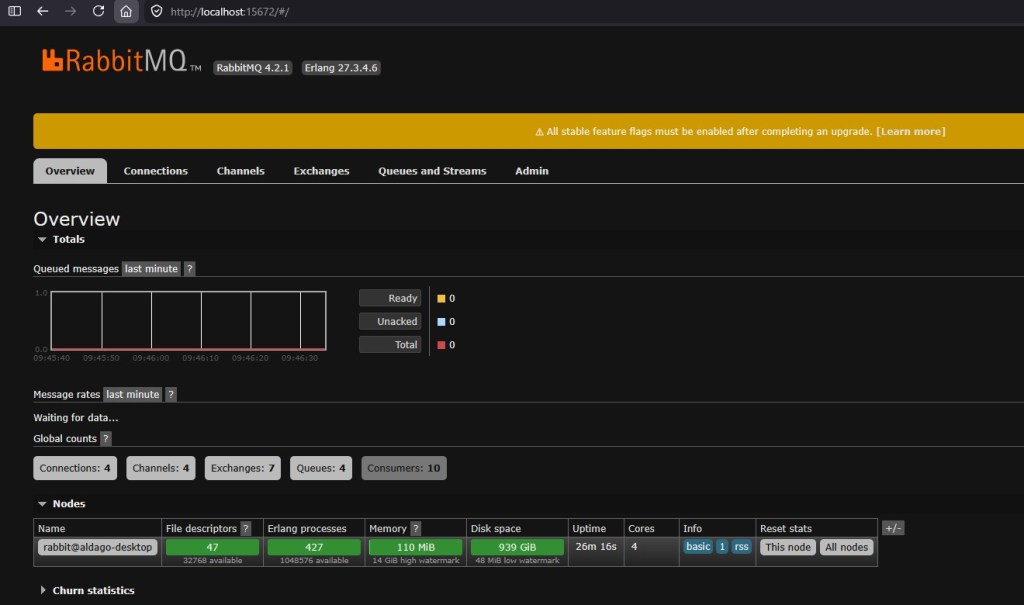
Now, you should be able to login into RabbitMQ’s console from http://localhost:15672 with the user just created:
Now, you need to copy the OT IV license replacing the existing INTELLIGENT_VIEWING.lic file on the installer folder. Once you have the license, you can run the OTDSConfig program that will upload the license and create the required configuration on OTDS:
[dmadmin@localhost /opt/documentum/sw/iv]$ ./OTDSConfig -u http://localhost:8180/otdsws -a <otds admin user> -p <otds admin password>
This will generate a _default_Auth.properties file with the following info:
LICENSE_RESOURCE=<value>
PUBLICATION_AUTH_CLIENT_ID=iv-publication
PUBLICATION_AUTH_CLIENT_SECRET=<value>
PUBLISHER_AUTH_CLIENT_ID=iv-publisher
PUBLISHER_AUTH_CLIENT_SECRET=<value>
SEARCH_AUTH_CLIENT_ID=iv-search
SEARCH_AUTH_CLIENT_SECRET=<value>
Take note of the values generated for the client ids as well as the value for the license resource. Now we have to edit the IntelligentViewing_Linux.properties file. Important values to modify here are the following:
ALLOW_DEFERRED_CONFIGURATION=false
JAVA_HOME=/opt/documentum/jdk-21.0.9+10
DEFAULT_HOST=localhost
OTDS_ORIGIN=http://localhost:8180/otdsws
OTDS_AUTH_FILE_PATH=/opt/documentum/sw/iv/_default_Auth.properties

LICENSE_RESOURCE=<value>
OT_INTEGRATION=true

DEFAULT_DB_HOST=localhost
DEFAULT_DB_PORT=5432
DEFAULT_DB_NAME=iv
DEFAULT_DB_USER=iv
DEFAULT_DB_PWD=<password>
DEFAULT_DB_USE_SSL=false
DEFAULT_DB_PROVIDER=postgresql

RMQ_HOST=localhost
RMQ_PORT=5672
RMQ_USER=mqadmin
RMQ_PWD=admin

PUBLISHER_AUTH_CLIENT_ID=iv-publisher
PUBLISHER_AUTH_CLIENT_SECRET=<value>
PUBLICATION_AUTH_CLIENT_ID=iv-publication
PUBLICATION_AUTH_CLIENT_SECRET=<value>
SEARCH_AUTH_CLIENT_ID=iv-search
SEARCH_AUTH_CLIENT_SECRET=<value>
Everything else should be ok with the existing values, so now we just have to run the intaller:
[root@localhost ~]# subscription-manager repos --enable rhel-7-server-optional-rpms

[root@localhost ~]# ./IV.Installer --install ./rpm --prereqs --configure ./IntelligentViewing_Linux.properties -l ./log.txt

[root@localhost ~]# chown -R otiv:otiv /home/otiv/.opentext
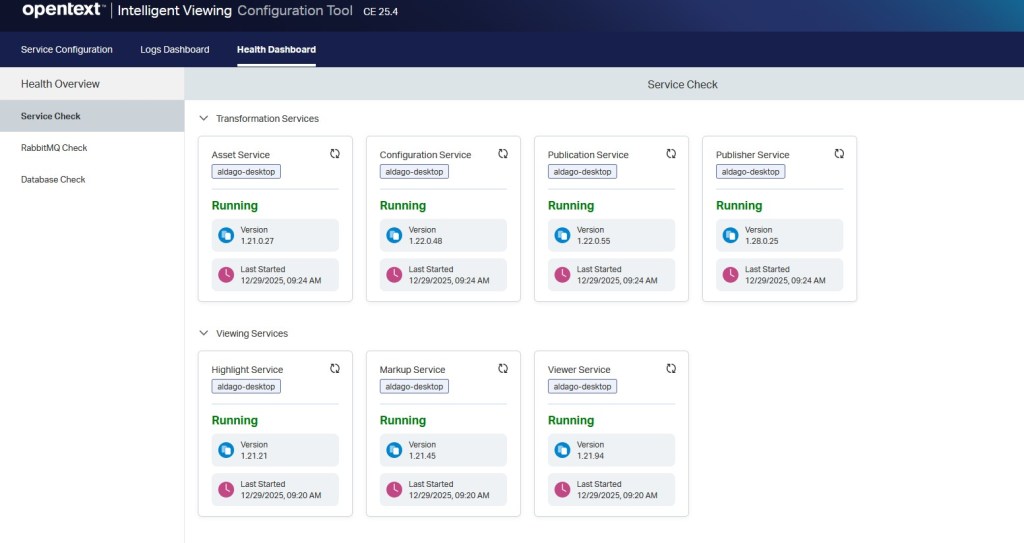
Hopefully the installer will finish correctly and IV will be installed. Logs can be checked on /var/log/opentext but we can also use the console application to check the status/adjust configuration:
[root@localhost ~]# /opt/opentext/ConfigurationTool/config-tool.sh
Now, we should try checking if this works or not. In the past, IV included a demo application (metis) but that is no longer the case. However, there’s a publicly available sample application on github: https://github.com/opentext/ivsa
Download the code, and create a .env file on the root of the project with the following values:
OTDS_ORIGIN=http://localhost:8180
OAUTH_CLIENT=test-iv
PUBLICATION_AUTHORITY=http://localhost:3356
MARKUP_AUTHORITY=http://localhost:3352
HIGHLIGHT_AUTHORITY=http://localhost:3357
VIEWER_AUTHORITY=http://localhost:3358
FILESTORE_PLUGIN=httpurl
This configuration will allow to test a file provided by url. For doing this I just copied the sample documents provided with this application to one of the tomcat’s ROOT webapp, so it can be accessed via browser.
Now we need to create an OTDS Oauth client named “test-iv” and add the following values to permisible scopes and default scopes:
view_publications
create_publications
Now we can build the application:
npm install
npm run build
As usual, the scripts are windows encoded, so before running the ivsa command make sure to run the dos2unix command on all files on the project, otherwise it won’t run. Finally, try to execute the ivsa application on one of the copied files to tomcat providing and user/pass existing in OTDS allocated to the IV license:
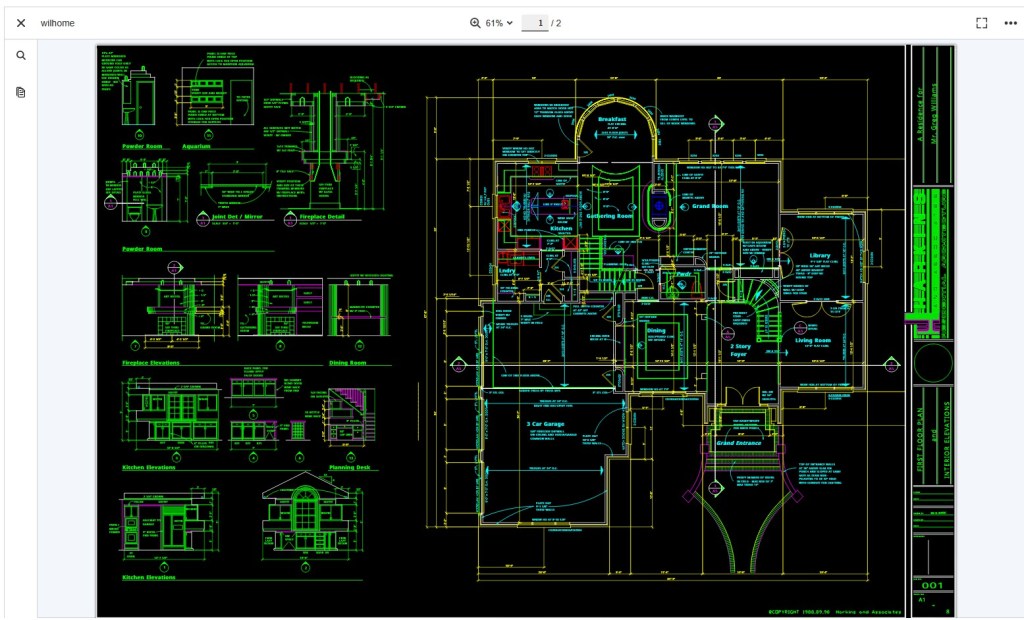
./ivsa -u <user> -p <pass> -V http://localhost:8180/wilhome.dwg
And you should see this: