One of the new features from Documentum 25.4 is that OTDSAuthenticator runs now outside JMS. This brings a clear advantage: authentication doesn’t depend on JMS.
However, this is something we can easily achieve on earlier versions of Documentum and get some benefits as well:
As mentioned before, if JMS crashes or runs out of memory or whatever, your users will still be able to authenticate
If you’re running a cluster, you can use a DNS load balancer and actually have a balanced OTDSAuthenticator service (as how it works now is defining OTDSAuthenticator url as “localhost” which binds each node to its local OTDSAuthenticator, but this is not fault-tolerant, as losing one JMS will render that node useless as it won’t be able to authenticate users)
This process is actually quite simple:
Get an application server (Tomcat, Jetty, etc.)
Drop it on whatever folder on the server (I would use $DOCUMENTUM/otdsauth)
Modify the app server configuration to use an unused port instead of the default 8080
Copy $DM_JMS_HOME/webapps/OTDSAuthenticator to your app server webapps’ folder and start the server
Once the database is installed, we can start installing the first required applications and required packages such as nodeJS, npm, etc (Java is already present from Documentum Content Server installation)
[root@localhost ~]# rabbitmq-plugins enable rabbitmq_management
Enabling plugins on node rabbit@localhost:
rabbitmq_management
The following plugins have been configured:
rabbitmq_management
rabbitmq_management_agent
rabbitmq_web_dispatch
Applying plugin configuration to rabbit@localhost…
The following plugins have been enabled:
rabbitmq_management
rabbitmq_management_agent
rabbitmq_web_dispatch

started 3 plugins.

[root@localhost ~]# rabbitmqctl add_user mqadmin admin
[root@localhost ~]# rabbitmqctl set_user_tags mqadmin administrator
[root@localhost ~]# rabbitmqctl set_permissions -p / mqadmin ".*" ".*" ".*"

[root@localhost ~]# systemctl enable rabbitmq-server
Created symlink /etc/systemd/system/multi-user.target.wants/rabbitmq-server.service → /usr/lib/systemd/system/rabbitmq-server.service.
[root@localhost ~]# systemctl start rabbitmq-server
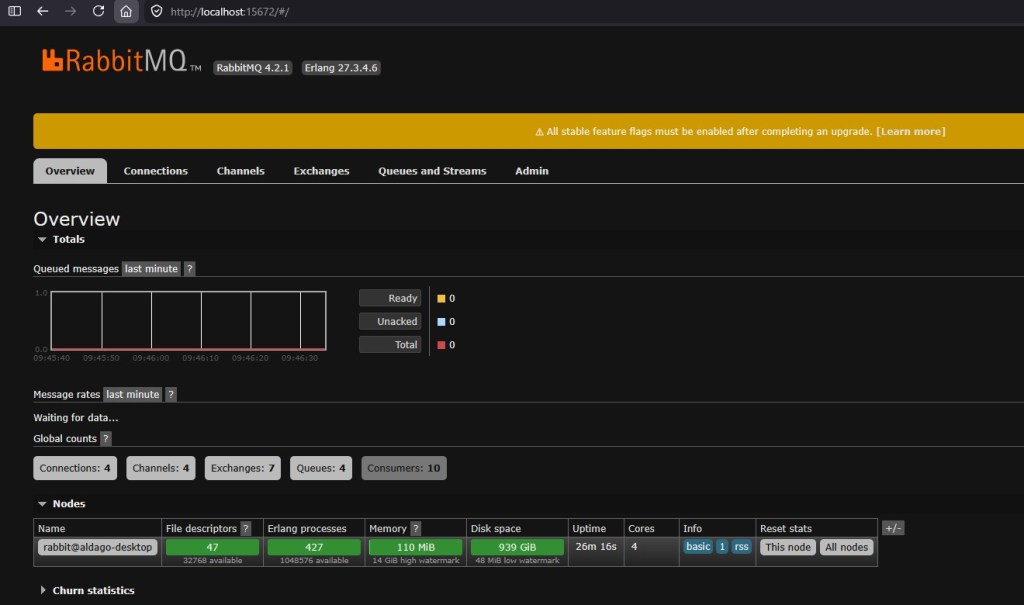
Now, you should be able to login into RabbitMQ’s console from http://localhost:15672 with the user just created:
Now, you need to copy the OT IV license replacing the existing INTELLIGENT_VIEWING.lic file on the installer folder. Once you have the license, you can run the OTDSConfig program that will upload the license and create the required configuration on OTDS:
Take note of the values generated for the client ids as well as the value for the license resource. Now we have to edit the IntelligentViewing_Linux.properties file. Important values to modify here are the following:
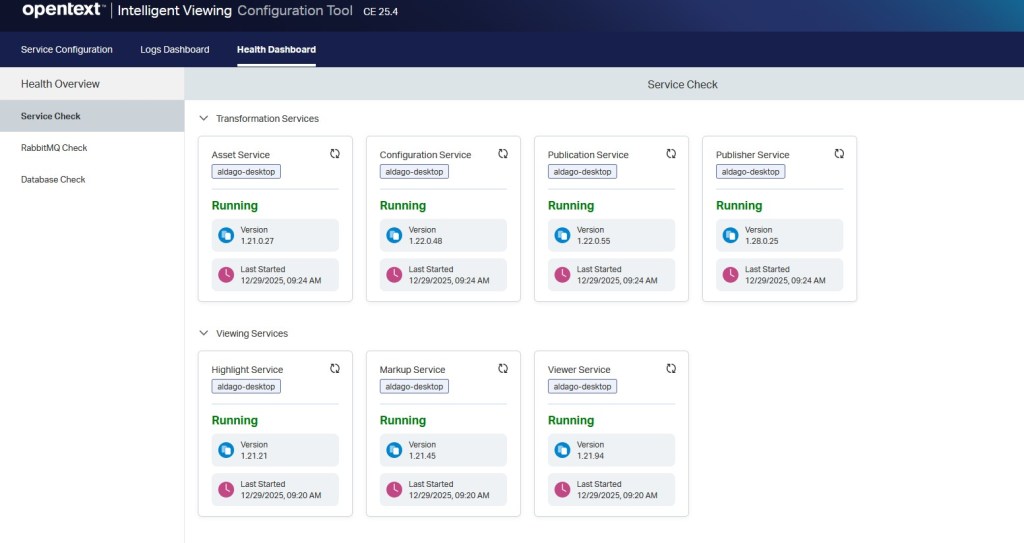
Hopefully the installer will finish correctly and IV will be installed. Logs can be checked on /var/log/opentext but we can also use the console application to check the status/adjust configuration:
Now, we should try checking if this works or not. In the past, IV included a demo application (metis) but that is no longer the case. However, there’s a publicly available sample application on github: https://github.com/opentext/ivsa
Download the code, and create a .env file on the root of the project with the following values:
This configuration will allow to test a file provided by url. For doing this I just copied the sample documents provided with this application to one of the tomcat’s ROOT webapp, so it can be accessed via browser.
Now we need to create an OTDS Oauth client named “test-iv” and add the following values to permisible scopes and default scopes:
view_publications
create_publications
Now we can build the application:
npm install
npm run build
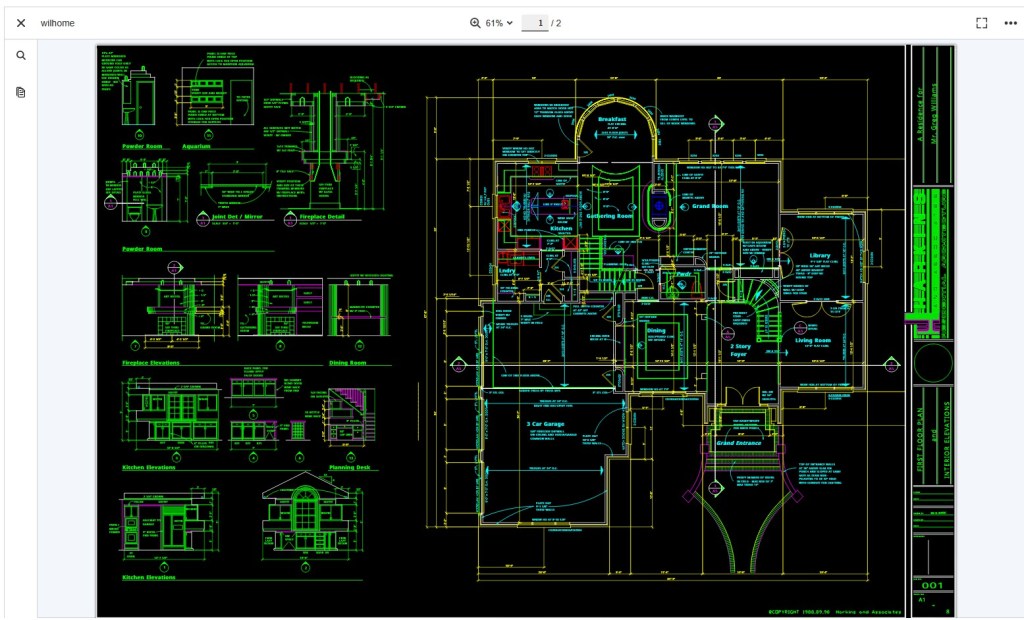
As usual, the scripts are windows encoded, so before running the ivsa command make sure to run the dos2unix command on all files on the project, otherwise it won’t run. Finally, try to execute the ivsa application on one of the copied files to tomcat providing and user/pass existing in OTDS allocated to the IV license:
This is a step-by-step guide to install Documentum 25.4 in WSL2 using the Rocky Linux 9 (closest to the supported RH9) image with PostgreSQL 17. This version comes with some changes:
OT has repackaged (and rebranded for the 100000th time again the products) the installer into zip files
Documentum CM runstack:
Content Server PostgreSQL and Oracle
Documentum Administrator
Process Engine
Workflow Designer
Thumbnail Server
iJMS
Documentum CM experience:
Documentum Clients
D2 (now called “Classic”) and SDK
D2-Config
D2-Smartview and SDK
Administration Console
D2-REST and SDK
D2 Mobile
D2 Plugins (C2, O2, etc.)
Documentum CM API and Dev tools:
Composer
DFC
DFS and SDK
DCTM-REST and SDK
CMIS
Connector for Core
Documentum Search is no longer available (until at least 2027) because of performance and result inconsistency issues
Tomcat supported version is now 11 (will OT ever update xPlore’s Tomcat?)
JMS tomcat no longer has the version on the folder path (now is $DOCUMENTUM/tomcat)
OTDSAuthenticator is no longer part of the JMS, but it runs as an http service listening on port 8400. The binaries/configuration are located on $DM_HOME/OTDSAuthLicenseHttpServerBin and the otdsauth.log is now located on $DOCUMENTUM/dba/log
We have the new admin console which in theory should replace (one of this years :D) DA. As we have seen for many years with D2, everything comes “preconfigured” for windows (dfc.properties points to “C:\Documentum\config\dfc.properties” on Linux packages). In a “default” installation you can skip deploying this as it has no use:
Clients (D2) now have a similar installer as the CS, but OT still can’t properly configure log paths (Engineering must have never heard of catalina.base/home variables. Will they ever stop making all log files on Linux point to C:\Logs\xxx.log?)
Initial Configuration
I will not go through the basic configuration, as you can follow the steps detailed for Documentum 25.2. You just need to use proper Java version and modify the environment variables that change ($DM_HOME, $DM_JMS_HOME, $JAVA_HOME).
Also remember to start the OTDS authentication HTTP service if you want to use licenses, otherwise you could only login into DA. In case you want to setup licensing you can follow the steps from theOTDS licensing configuration post.
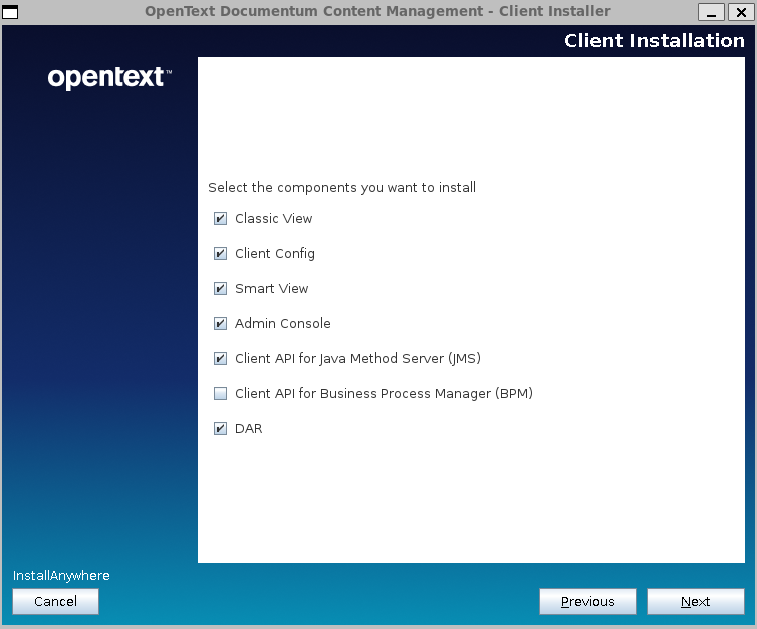
Client installation
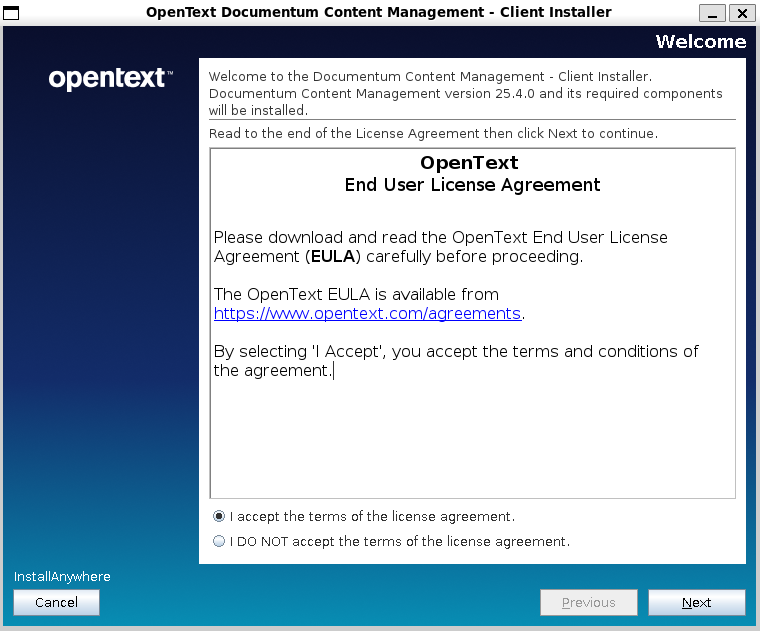
You’ll need to unzip the clients package zip and run ./Documentum-Client-Installer.bin:
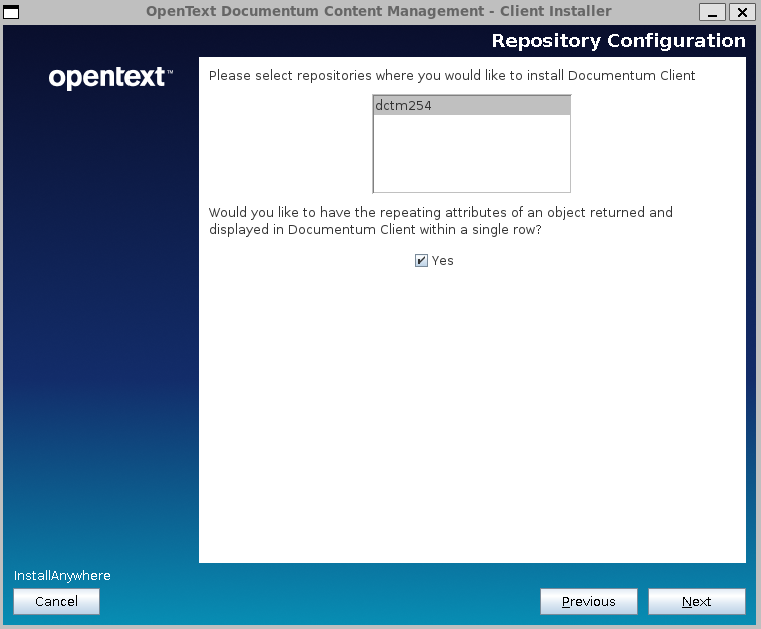
It looks like we finally have support for multiple repositories configuration:
After the installation is done you’ll have the war files ready to be deployed:
Drop the files to your Tomcat 11 installation
Update dfc.properties and log4j2 and logback configuration (as everything will be writing to C:\xxx)
Starting with Documentum 24.4, OTDS is now mandatory for managing licenses, meaning that you won’t be able to use any client without license (not even with dmadmin). OpenText has a white paper on the support page called “OpenText™ Documentum 24.4 – OTDS Configuration” that you can check (as it has had several iterations with several updates).
This post will cover the minimal steps required to set-up a development environment (after you request a developing license), as these are… some steps (wonder how is this supposed to work on a cloud environment… you deploy your wonderful kubernetes cluster and… nothing works until you manually perform all these steps?).
Following the white paper, the first step is creating a new non-synchronized partition, that later will be populated with the repository inline users (I do not even want to ask what happens when you have more than one repository and these users have different passwords!):
After this, you can ignore the creation of the resource, as it is not required to create the users via OTDS (if you’re going to use dmadmin or a few users, you probably already have these on the repository and will be “imported” to OTDS, so the resource is not needed).
Then, you need to import the license provided by OT support.
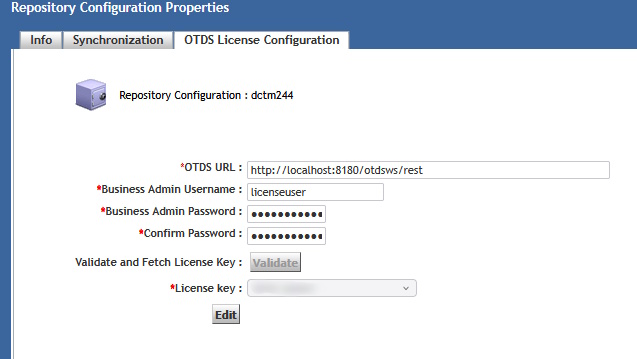
Now that we’re done with the “prerequisites”, we need to create what OT calls “business admin user” which is basically the user DCTM will use to connect to OTDS and check the license. This user needs to be created first on OTDS and then added to the “otdsbusinessadmins” groups.
After this, we need to create the user again in Documentum. For this, the guide suggests to use the following API script:
Once this is created we need to allocate the existing license to an OTDS partition. With this step the “initial setup” is done and you should see something like this on DA:
Now we need to create the inline users (dmadmin) in the OTDS partition so these are “licensed” to use application. For some reason (lack of knowledge I guess), OT complicates things too much as, not only you have to run a command-line Java command, but the documentation forces you to create a copy of dfc.properties in the dfc folder (??!!??!!) and to explicitly declare the environment variables for Java… that should be already present on the system (otherwise Documentum won’t be working properly… which I could expect happens to the talented team :D).
So instead of following the instructions on the white paper, just run the following command:
Finally (yes, we’re almost done), you need to update otdsauth.properties file under JMS with the proper information, restart everything and hopefully, you’ll have now a licensed development environment.
If you work with Documentum, sooner or later you’ll have to face that moment were you’re going to have to use OTDS in your system (as this is mandatory since Documentum 23.4). I will try to provide some insights and tips about OTDS and Documentum in this post.
OTDS is basically an IDP (an authentication/access control system) that OpenText created (having in mind “other” solutions more limited than Documentum) and that they have been pushing to many of the products of their portfolio.
What are the positive things that OTDS brings to the table when we are talking about Documentum?
Centralized authentication management (as in: configure you authentication in 1 place, and reuse for all components, removing the need of having different libraries/configurations in webtop, d2, rest, etc.)
Centralized user/groups management: I just don’t buy this, because it relies on companies having a “perfectly organized LDAP/AD” which I’ve never ever seen. Even worse if we include here application-level group/roles, where in Documentum you can have group structures defined that are years away for any existing configuration in any AD/LDAP (and I do not see anyone manually creating thousand of existing Documentum groups in OTDS).
Centralized licensing management (another push from other products, we will see how this really works, as I already expressed my concerns in a previous post)
Obviously, not everything is fantastic, and the are several topics you should be aware of:
An authentication system is totally outside the scope of ECM departments, meaning that no ECM expert is capable of properly evaluating, configuring or maintaining a system of this kind (have a talk with your cybersecurity/authentication team before doing anything!). Not only that, this can conflict with existing policies in your company regarding authentication policies.
OTDS is not a product (check OT’s product page) but it is considered a “component” of other products. What does this mean?
You’re using a critical (as it is what it is supposed to handle access to your data) product which is not “recognized” even by their own vendor
OT has a leader solution in this field, NetIQ, which came with MicroFocus, so it is not clear what their roadmap is regarding IDPs.
There’s no “product support” for OTDS, but this is delegated to other product teams (ie: Documentum support). Obviously, they have no idea about OTDS itself, and OT bureaucracy makes highly complicated to get an answer when you have an issue.
OTDS is a single point of failure: OTDS doesn’t work -> No user can work, even if everything else is up and running.
OTDS was conceived for other, much simpler, OT’s products. As Documentum is kind of a Swiss army knife, OTDS greatly limits existing DCTM configurations (which makes this integration a challenge in certain environments)
So, given these topics, what scenarios can we found when integrating OTDS?. Well, it depends on your existing system. I think most systems can be grouped in three different categories:
Highly regulated / complex systems: You have your own IDP (EntraID, NetIQ, etc.), you also have your own system to handle access to Documentum (ie: automatic creation of users on repositories). This also includes multiple repositories in the organization, and many applications with many groups.
Small installations: Single repository approach, not many users, not many groups, still using user/password login
New systems / upgrades to a “clean” system
Based on this, what is the best (or only) approach to integrate OTDS in these scenarios?
Highly regulated / complex systems: Forget about documentation. You do not need resources, access roles or anything. Just use a synchronized partition with the required oauth clients and delegate authentication to your existing IDP. Minimal configuration, minimal maintenance (other than getting this to work). OTDS here acts just a proxy for getting the OTDS token that will be used by DCTM applications.
Small installations: Ideal scenario as you’re using Documentum as some of the other, more limited products from OT, so this is what OTDS was originally intended for. Probably you’ll only effort will be manually configuring groups.
New systems / upgrades: You “should” try to use OTDS in the “expected” way. Be aware of several limitations coming from the lack of support for existing solutions in Documentum:
Multirepository configurations are a nightmare. Nobody seem/wants to understand that you can have different users, in different repositories, and this can be a challenge.
Mix of functional/inline accounts and users accounts can be a challenge as well.
Finally, some tips that you should consider when using OTDS:
As soon as it is configured, add you organization users responsible for OTDS to the admin group, disable the otds.admin account and force 2FA authentication (and manually remove the user/pass login from otds-admin). You do not want to expose the admin page to anybody (even less if you have this running on a public cloud) as this is a huge security risk.
Token TTL is a topic when dealing with timeouts. Until now you only had to worry about web application timeout, but now also the OTDS token can expire, so the TTL should be something like TTL=timeout+buffer of time, so if a user stops using an application after 1 hour, and you have defined a 4 hours timeout on the application, your token needs to be valid for at least 5 hours.
When configuring D2, completely ignore the documentation. By no means mess with the tickets (who thought of this approach? who allowed this to be done??) or perform the configuration part that tells you to enable the “Global Registry encryption in other repositories”. This is no longer required since 23.4 P09 (you’re welcome) as it is a huge security risk (and I’m quoting the talented engineering team here: “a design flaw”, but they still seem to have forgotten to remove that section from documentation).
Make sure you test all scenarios before going live or you’ll be in trouble, as fixing these “live” will be challenging:
Web interface authentication
DFC interface authentication
Token authentication
OTDS token generation from external authenticator token
Any existing user configuration authentication (LDAP, inline, functional accounts, direct url access to components, etc.)
This is a step-by-step guide to install OTDS 24.4 in WSL2 using the Rocky Linux 9 (closest to the supported RH9) image created in the previous post. OTDS requires:
Java being available on the system (this should be already done from the previous post)
An existing PostgreSQL database (we already have this as well from the previous post)
An existing/dedicated Tomcat server in the server
Initial Configuration
First we need to create the tablespace as user postgres:
Here we go again with another success sad history of OpenText and their cloud products. This time we’ve encountered a “funny” “feature” on the OTDS cloud container image.
We are deploying this on the cloud as part of a migration to Documentum 23.4, where OTDS is now mandatory. For this we deployed this OTDS on Azure, and first thing we see is:
So what do we do (OTDS is now quite a “simple product”, web application connecting to a DB, so there’s not much room for errors on a brand new deployment)? Let’s check the logs… kubectl logs… empty. Strange, let’s go directly to the container and check tomcat’s logs… tomcat/logs… empty. What? So we decide to dissect the image and what do we find? Another case of unexplicable decisions by OT: So what is happening here is that someone at OT has decided that this not an “OTDS cloud image” but rather “OTDS Cloud Foundry” image. So they have configured Tomcat (via setenv.sh) with Cloud Foundry logging, and removed everything else. As a result, if you’re using any other cloud provider, don’t be expecting any logs (because nobody would need to access logs for an authentication application, security audits? Nah).
So what can you do?
Obviously, first step is to report this to OT (done), and wait until someone realizes the mistake they have done (either “mislabeling” the image, as this is clearly not generic, or by simply releasing this publicly, as my suspicion is that this is OT’s internal OTDS image used in their environment).
However, while this happens, we can be a little bit more proactive. By opening the image we can rebuild the Dockerfile used to build this image, which, more or less looks like this:
FROM redhat/ubi9-minimal:9.2

LABEL maintainer="Red Hat, Inc."
LABEL com.redhat.component="ubi9-minimal-container" name="ubi9-minimal" version="9.2"
LABEL io.k8s.display-name="Red Hat Universal Base Image 9 Minimal"
LABEL io.openshift.expose-services=""
LABEL io.openshift.tags="minimal rhel9"

ENV PATH /usr/local/sbin:/usr/local/bin:/usr/sbin:/usr/bin:/sbin:/bin

RUN microdnf update -y && microdnf clean all
RUN microdnf install -y glibc-langpack-en tzdata fontconfig && microdnf clean all

COPY jdk-17.0.8+7-jre '/opt/jdk-17.0.8+7-jre'
RUN cd /opt; ln -s jdk-17.0.8+7-jre jre;

RUN mkdir -p /opt/newrelic;
COPY newrelic-agent-8.5.0.jar /opt/newrelic
COPY newrelic.yml /opt/newrelic
RUN cd /opt/newrelic; ln -s newrelic-agent-8.5.0.jar newrelic.jar;

RUN mkdir /opt/scripts && ln -s /opt/tomcat/bin/healthcheck.sh /opt/scripts/healthcheck.sh && chown -R otuser:0 /opt/scripts

COPY --chown=otuser:0 tomcat/ /opt/tomcat/
From here you can see OT is basically updating the base RH image, copying a JDK17, newrelic libraries (another library irrelevant to any OT product and that we’re just “pushed” to use/have there) and a “custom made” Tomcat (including the Cloud Foundry logging), so nothing too fancy.
So at this point, you can simply take your own Tomcat, and rebuild the image without Cloud Foundry, but why all these commands? why all that additional things in OTDS? Why is this image using RH minimal while CS uses Oracle Linux, and new containers are moving to Alpine? Why it is so difficult to align components to use the same technologies?
Well, here you have another approach to building the same image, and you can judge what looks simpler to build and maintain:
This is from a custom container that I’m using locally. Quick explanation:
tomcat:jre17-temurin: Official Tomcat image. Why would you bother to build something it is already done? No need to maintain / update JDK and Tomcat when Apache is already doing that.
COPY fragments: Despite this is W R O N G, I copied the webapps folder (which should be mapped from a persistent volume and never be included on the image) just to mimic OT’s approach, I just needed a few lines to include the applications, and required customizations (here, setPassword.sh will encrypt the provided password (s) and update otds.properties accordingly)
ENV variables: Well, parameters that we can customize
Anything else: You add whatever you need because that would not be part of OTDS, but requirements of your own environment.
And there you go, a simpler container image in no time. Do you need to update Java or Tomcat? Just use a newer Tomcat image and it is done. Do you want to deploy on Azure or AWS? Do it, you’ll have logs (unlike right now, even on 24.1)